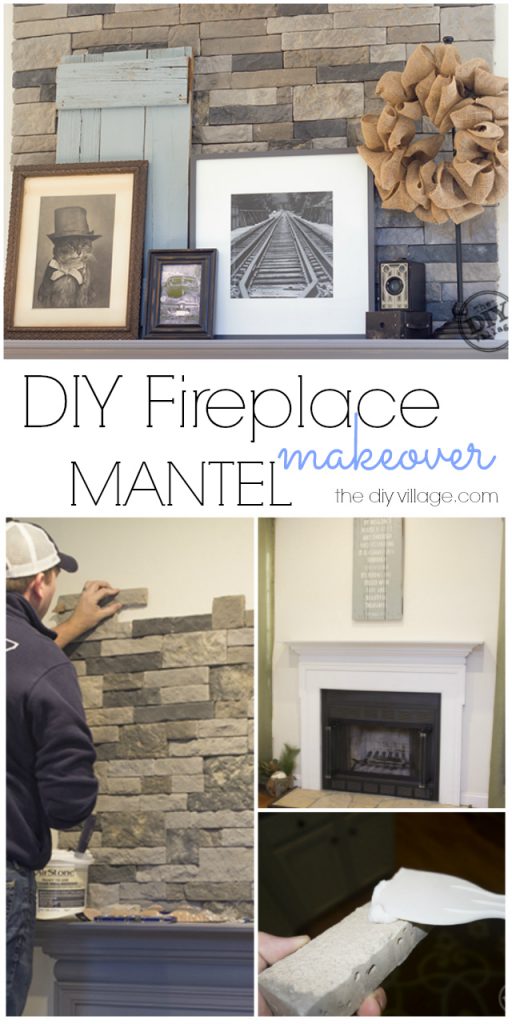
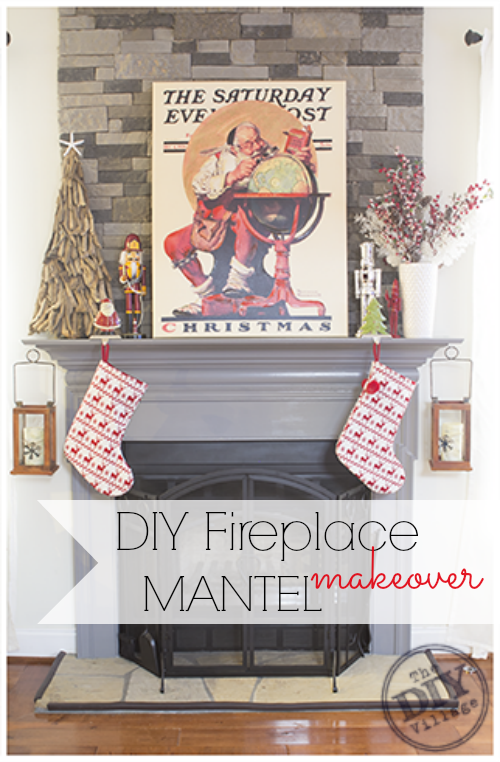
Every year around this time, our fireplace mantle takes center stage! It gets adorned with holiday decorations galore and really helps set the mood for the rest of the year! Jacque and I decided that it would be the perfect time to check a project off the Never Ending Honey-Do-List, so we thought we’d tackle a Fireplace Mantel Makeover!
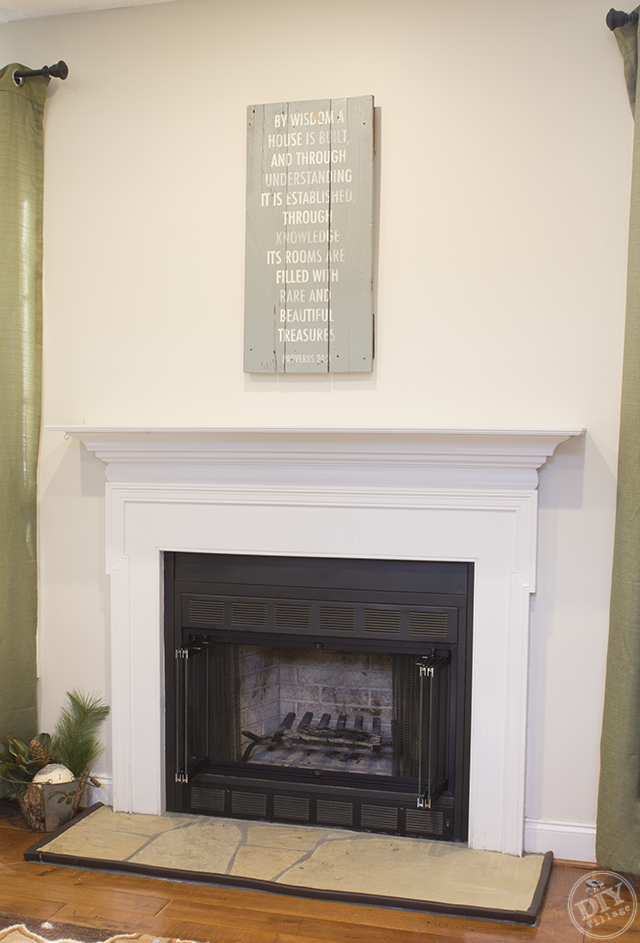
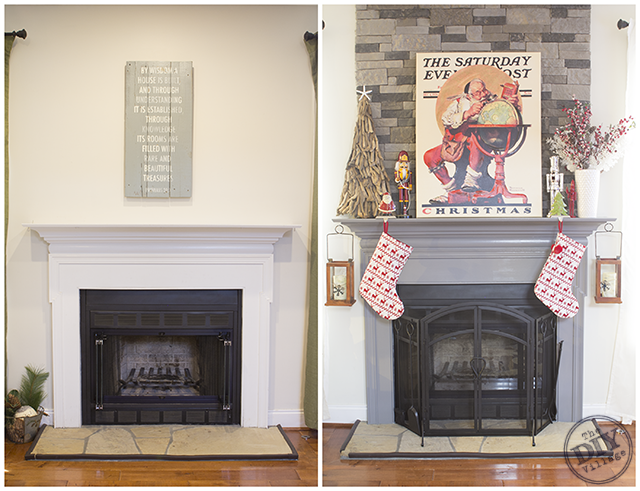
Here’s a look at what we started out with. Just your run of the mill fireplace mantel painted white. We added some character to the hearth by installing some padded edges, looks good right? haha
A simple paint job does wonders for transforming a fireplace mantel. We discussed for a while what color we wanted to paint the mantel and while we were visiting the Lowe’s headquarters it came to us, the mantel had to be gray! We went with semi-gloss Dover Gray Paint & Primer by Olympic.
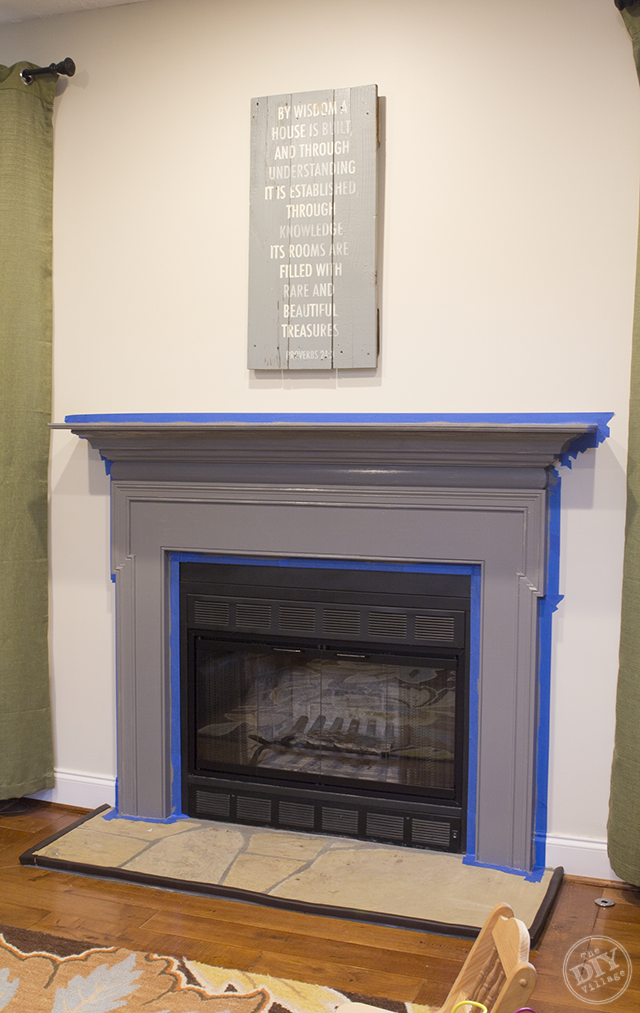
This in itself could have been enough to satisfy our DIY itch, but we wanted to take it a step further! Well, to be honest I was satisfied but Jacque kept on about wanting to install barn boards, and trim moldings and on and on and and on. It sounded like way too much work so we compromised.
We decided to try our hand at installing AirStone, an ultra-lightweight alternative to real stone. It comes in three different color collections, Vineyard Blend, Spring Creek, and Autumn Mountain. (We went with Spring Creek)

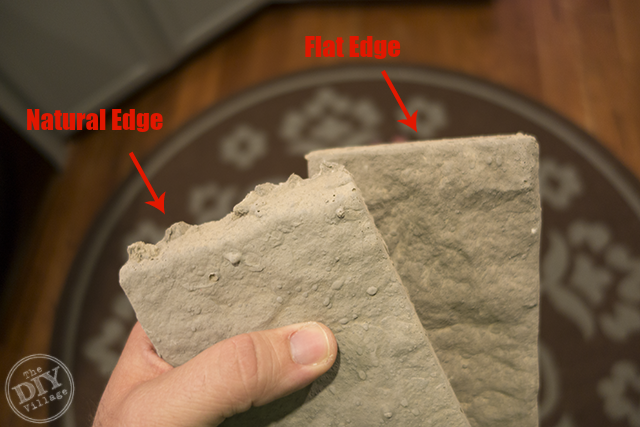
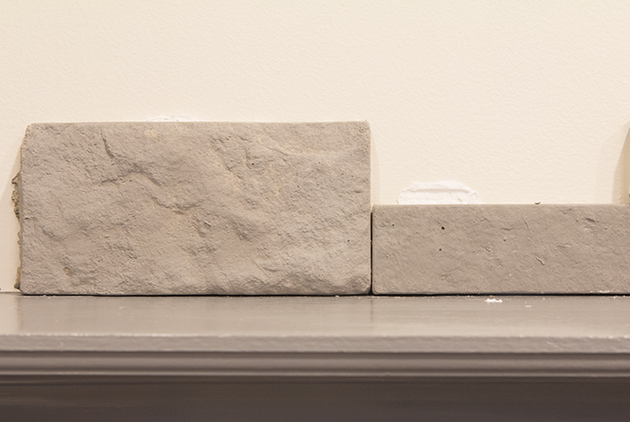
Once we chose our color, we needed to get the necessary stone. There are two different types of flat stones to work with, flat edge and natural edge. The natural edge stones are used to as an outer border, while the flat edged stones are used to fill in the inner voids.
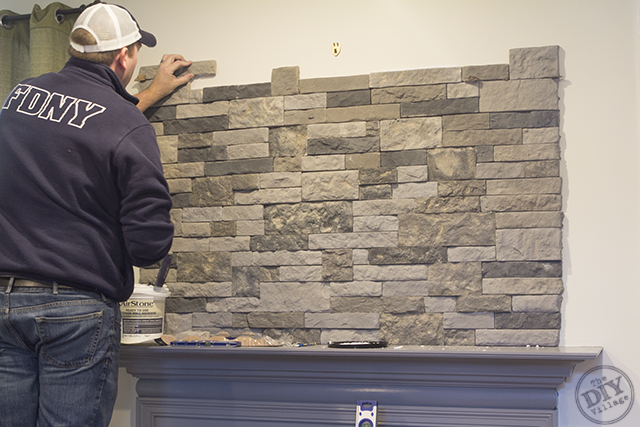
With all the materials in hand, we began the install. Start with a level surface and begin with a natural edge stone. The surface prep consists of making sure the wall is clean and dust-free.
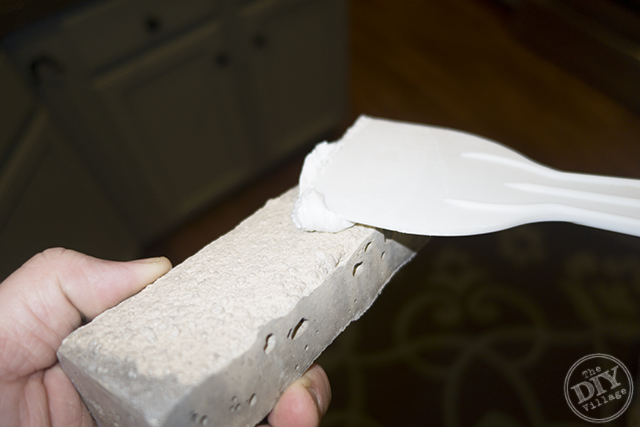
Using a putty knife, spread a generous amount of adhesive onto the back of the stone. (Described by the manufacturer as icing a cupcake)
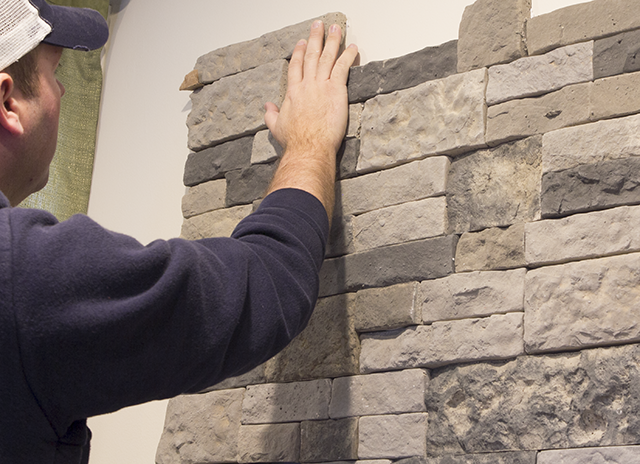
With the adhesive in place, press the stone firmly against the wall.
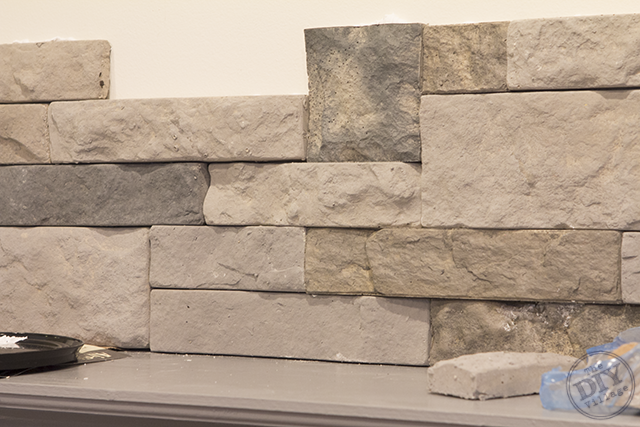
Each box of stone contains a few different shapes, lengths, and colors of stone, so it’s important to stagger the stones as you work across the work surface. Once the first row is in place, it’s just a matter of attention to detail and repetition!
During installation, it may be necessary to cut some of the stone. Although you can cut the stone with just a hacksaw, I’d recommend using a miter saw or angle grinder with a concrete cutting blade.
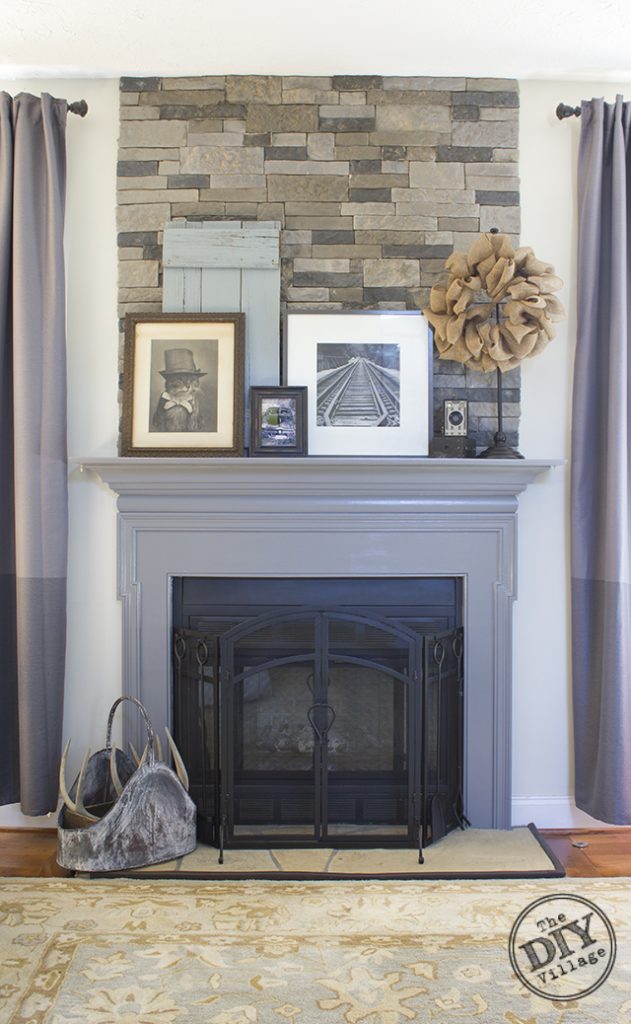
AirStone proved to be a surprisingly easy installation, plus the addition of the stone as an accent to the fireplace mantle, really makes a dramatic difference in the feel of the room. We carried the AirStone all the way to the ceiling to give the look of a stack stone chimney.
Here’s a look at the fireplace mantle before and after. Jacque is positive we have the best looking fireplace mantel in the neighborhood. You won’t hear any arguments from me. The room already feels warmer, inviting, and more like home! I can’t remember it any other way!
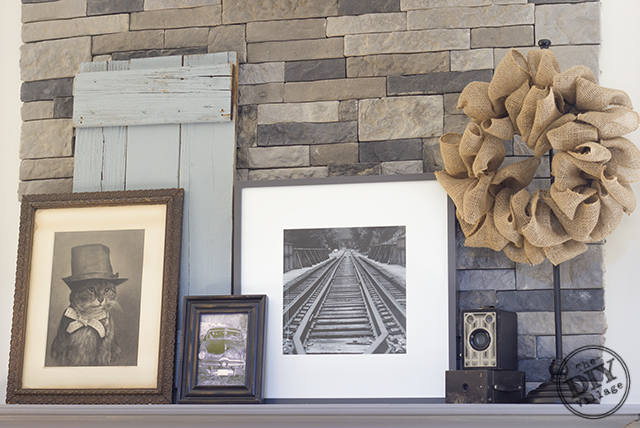 The stone and gray are very versatile and serve to be a great neutral for decorating year round!
Thanks to Lowe’s for their continued support in having us as members of their Lowe’s Creative Ideas bloggers! For more tips and inspiration for home projects, be sure to check out what the rest of the amazing DIY experts with the Lowe’s Creators & Influencers have come up with!
If you’re an iPad or iPhone user, be sure to download the Lowe’s Creative Ideas App to see some unique seasonal project ideas!
And if you need even more inspiration, follow Lowe’s Home Improvement on Pinterest, Facebook, and Instagram
Disclosure: As a Lowe’s Creative Ideas Handyman, I was provided a gift card to cover the cost of materials for my project, but I was not told what to write. All the ideas and words found here within are honest and my own!


Love the stone! Looks great, really adds interest to the fireplace. Every time I go to Lowes, I stare it on the endcap and think of what I could cover…I really, REALLY want to use airstone on the back of our breakfast bar.
What a makeover! Love the stone and the new mantel color.
Our fireplace (think 80s brass) is in desperate need of a makeover! That stone is just gorgeous and I love the gray paint choice!
Dude! This looks awesome!! And this reminds me….I was supposed to do something similar to my fire place! Whoops! 😉 Great job, guys!
Oh WOW! You guys must just sit and stare at it. It looks so good!!! Nice job guys 🙂 It really looks sensational. Merry, merry Christmas to you all. ~Shannon
Love the stone addition! It’s a fabulous way to add bulk and texture to your fireplace. Plus, it looks easy enough to do as a DIY over a weekend. Pinned! Visiting from the DIY Housewives tour. Cute idea!!
I love the stone and the grey makes everything look so rich!
Thank you so much! I’m just glad he went with me on this one. Builder grade fireplaces can be so blah!
Love the update… the color and stone are perfect compliments and really make it pop. Beautiful!!