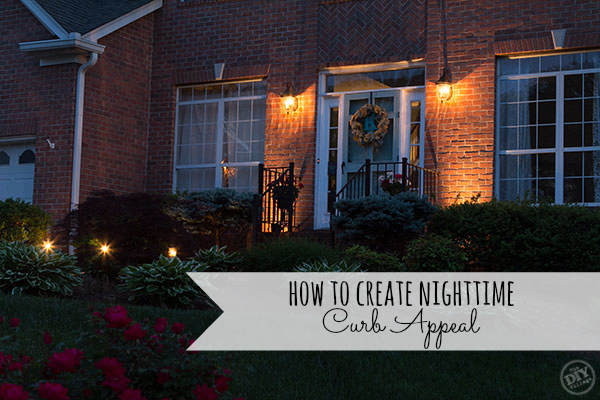
 As a homeowner, there’s nothing quite as rewarding as pulling up to your house and having pride in what it looks like. Something as simple as the color of your front door or newly planted flowers can really make a difference to how welcoming your home is. It’s easy during the day to see those things that enhance your house’s curb appeal. But what about when the sun goes down? Well, I recently stepped outside and took a good look at my house at dusk…And although I could still see the front door and the plants that make up my landscape, I realized that they weren’t what my eye was drawn to…My focus shifted to the lights on both sides of the front door. Of course, they helped to light the front stoop, but it felt incomplete, like it was a good starting point, but definitely not a finished product.
With that in mind, I decided to take a walk around my neighborhood to see which houses had “nighttime” curb appeal! The ones that caught my eye all had a few things in common; they all had pathway lighting and they all had accent lighting around their front doors. So, the next day I headed to Lowe’s in hopes of finding a budget friendly option for giving my house a curb appeal makeover! I went straight to aisle that housed all of the low voltage landscape lighting, and truthfully was a bit surprised to find so many options.
When it comes to low voltage landscape lighting, it’s important to decide how many lights you’re looking to install, then based on their wattage, you can choose which power supply will fit your needs! I figured that three pathway lights would light my prospective area nicely, and at 11 watts each, it wouldn’t require a huge power pack. Upward facing spotlights can be used to highlight the architecture of your home. With the addition of two spotlights at 20 watts each, my overall wattage totaled up to 73 watts. To give myself the option of adding more lights in the future, I chose to go with a 200 watt power supply.
Lastly, before leaving, I picked up 50′ of 14 gauge landscape lighting cable.
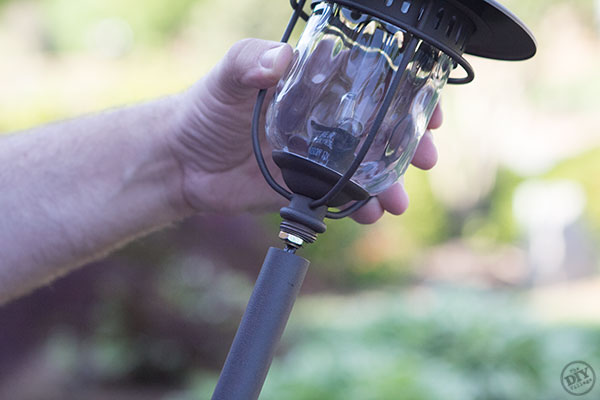
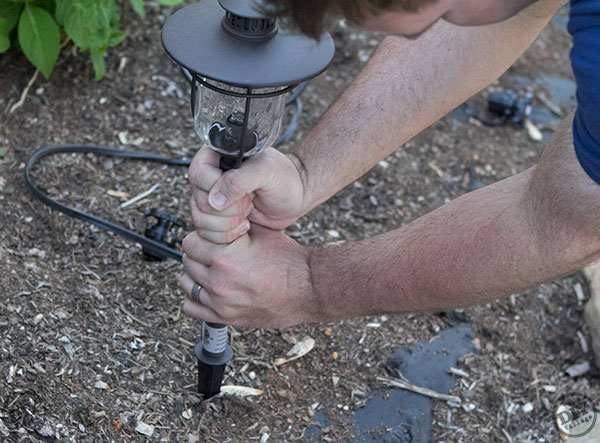
The prep work involved in assembling landscape lighting is pretty simple. Screw on the base to the light fixture.
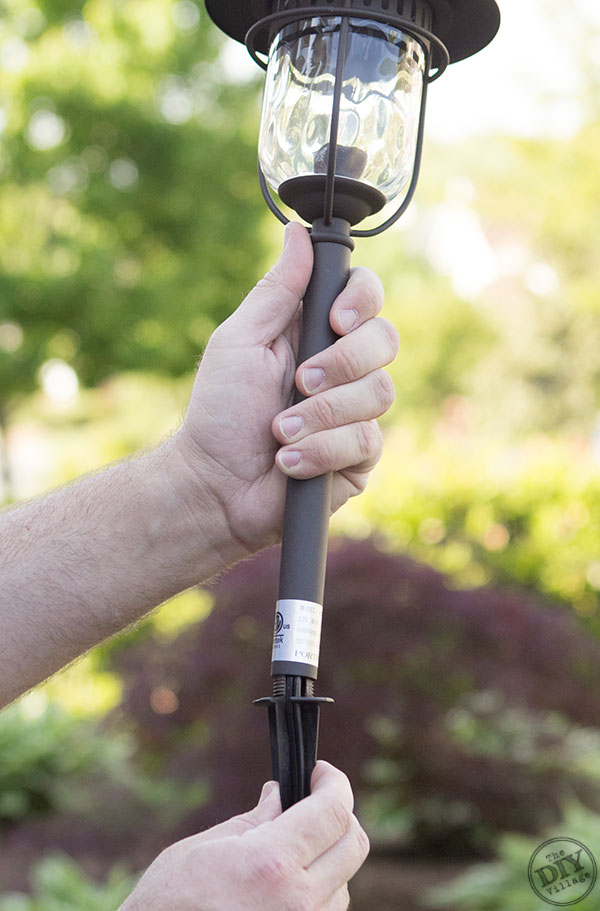
Then screw the stake into the base of the light.
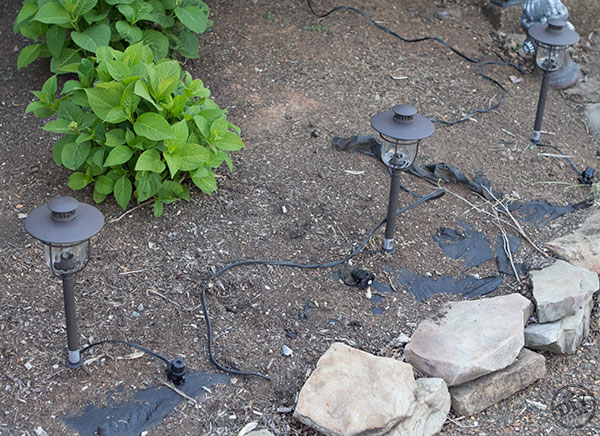
With the lights assembled, go ahead and set them in place.
Next, lay the lighting cable out following the path you’ve made with your lights.
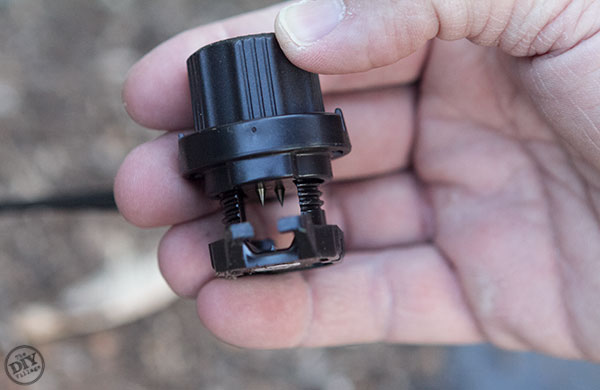
These particular lights are really easy to install. Simply, slide the cable through the wire connector. Each connector has two sharp prongs that when tightened down will pierce the sheath of the cable and make contact with the inner wire.
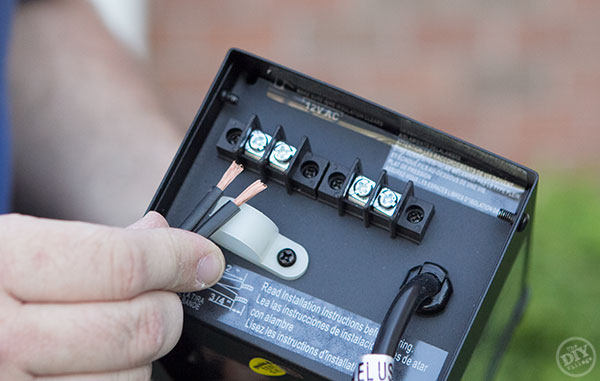
When you get to the end of your cable run, following the manufacturer instructions, go ahead and make the cable connection to the transformer. (Make sure to leave the transformer unplugged until you’ve completed the wiring process)
Before burying anything, make sure to test the lights first! There’s nothing worse than neatly burying your cables only to have to dig them back up to troubleshoot a wiring issue! Also keep in mind that what looks like correct light placement during the day could very well need to be changed up after the sun goes down and you’re able to see your lighting coverage!
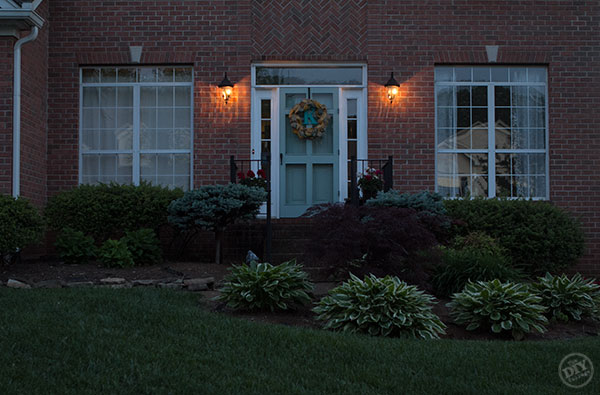
With investing less than $200 and an hour of work, here’s a look at the difference the landscape lighting made for our house!
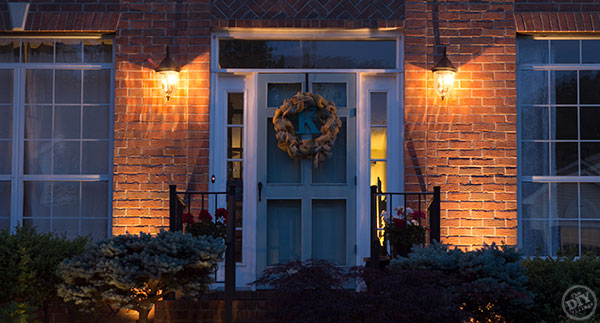
Here’s a closer look at how the upward facing spotlights highlight the area around the front door!
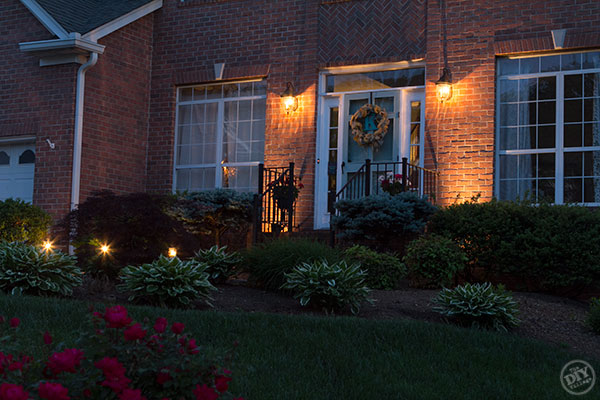
And lastly here’s a view from the street!
Whether you’re looking to put your house on the real estate market or you’re just looking to add value to your home, consider giving your home a nighttime curb appeal makeover!
Spring is calling!
With the arrival of spring, we’re excited to see what other outdoor projects we can cross off the Never Ending Honey-Do-List!
Be on the lookout for those and a ton more outdoor themed projects brought to you by the Lowe’s Creators & Influencer!
If you’re an iPad or iPhone user, be sure to download the Lowe’s Creative Ideas App to see some unique seasonal project ideas!
And if you need even more inspiration, follow Lowe’s Home Improvement on Pinterest, Facebook, and Instagram
Disclosure: As a Lowe’s Creative Ideas Handyman, I was provided a gift card to cover the cost of materials for my project, but I was not told what to write. All the ideas and words found here within are honest and my own!
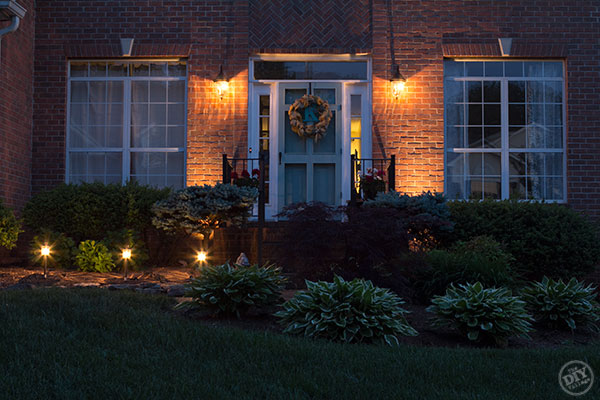

What a huge, bright difference your outdoor lighting makes!
booyah! ha! nighttime curb appeal … love it! love love love landscape lighting. well done Matt. ~jb
GORGEOUS! I especially love the upward facing lights next to the doorway, that’s super brilliant! We just have one little bulb over our front door…but hey, at least it has a cover on it so it’s not totally naked! I’ve been so focused on our backyard, trying to get the garden started up, but the front yard needs work too!
My husband has been wanting to add lights for years and we’ve kept putting off because it looked too overwhelming. You totally dispelled that! Definitely going to check out Lowes!
LOVE this post! I feel like there aren’t a ton of posts like this – thanks for sharing!
This is so smart and looks so great! It’s amazing how much difference the additional lighting made to your nighttime curb appeal – just beautiful!
I love the idea! It looks awesome!