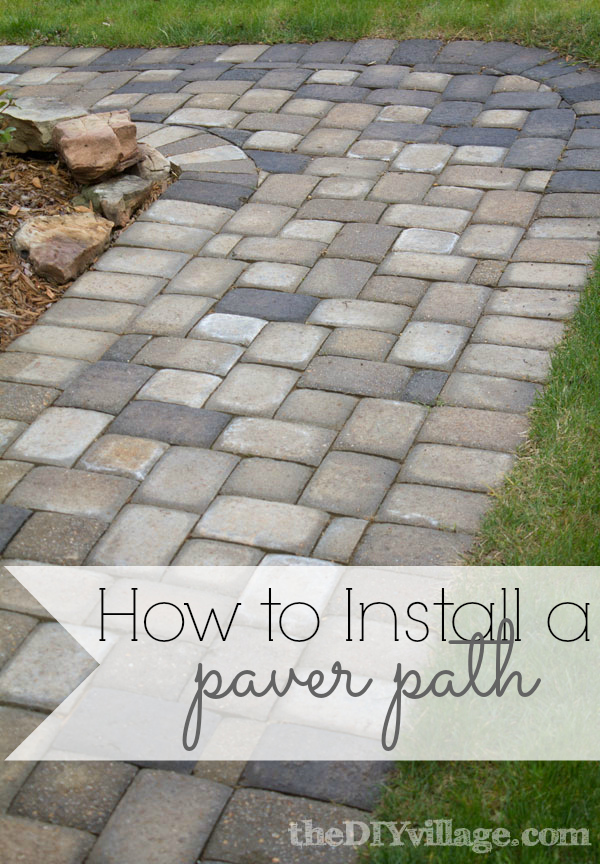
 Hi all, it’s Matt, the other half of theDIYvillage team!
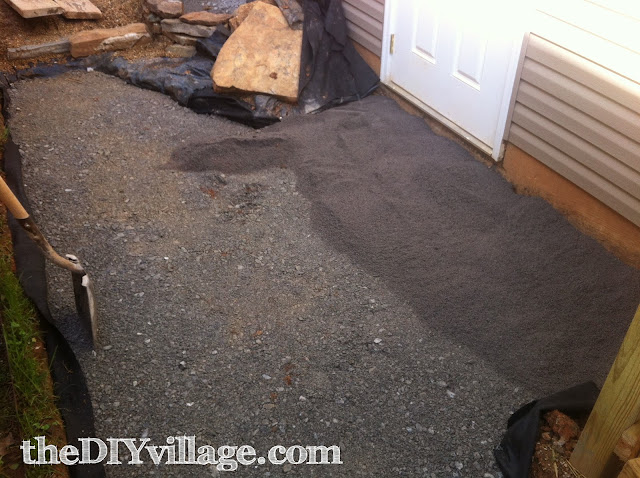
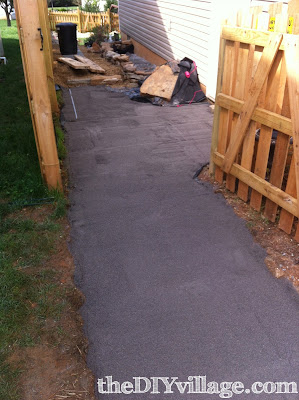
We trucked in 3 tons of crusher run gravel and used a hand tamper to help pack the gravel in place.
*Safety Note-WATCH your fingers and hands while using a dead blow hammer-they hurt… a lot *
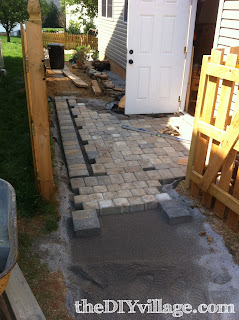
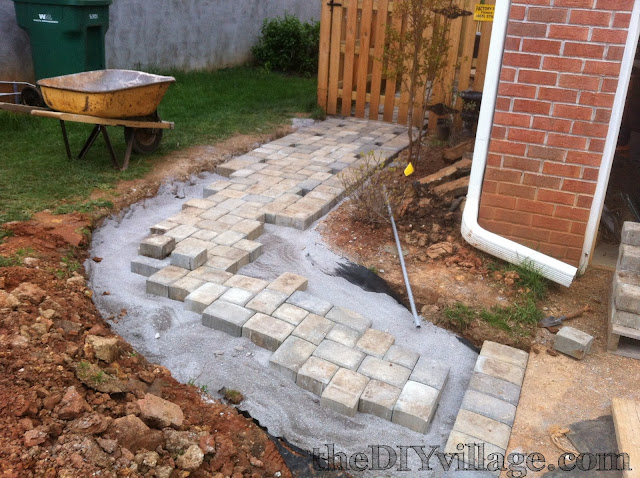
Once we made it to the gate, we modified the pattern by making 3 transition rows of all squares. I just thought it would be a nice touch to take you into the area in front of the gate!
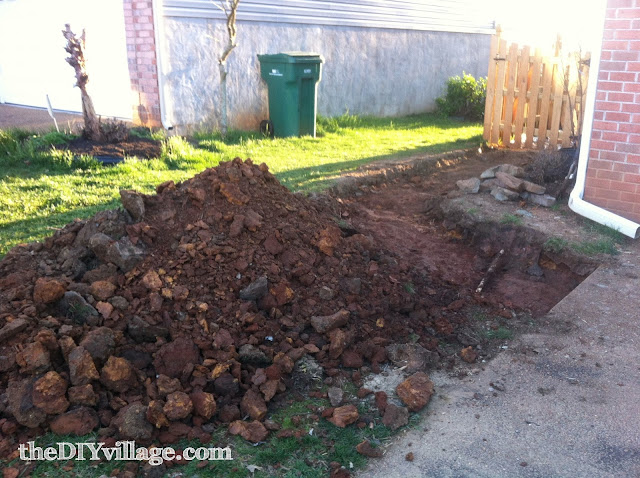
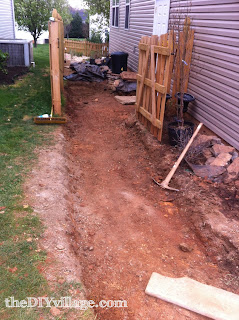


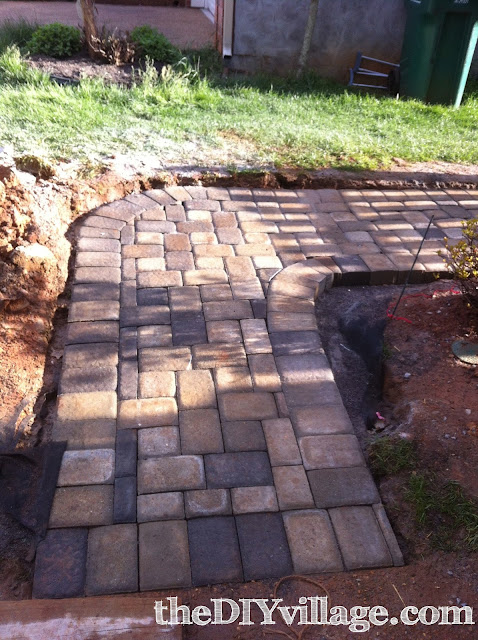
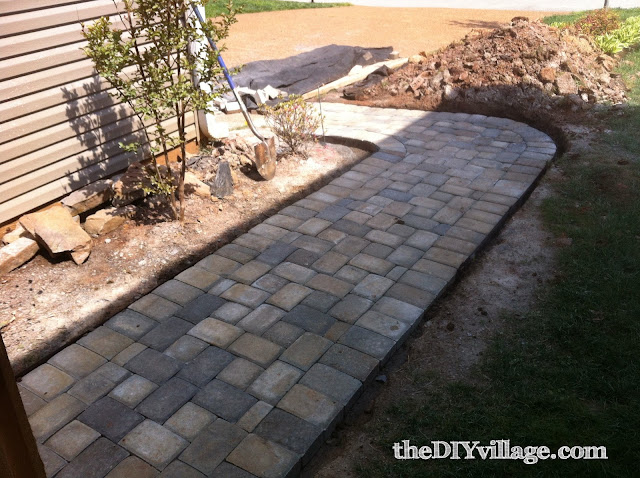
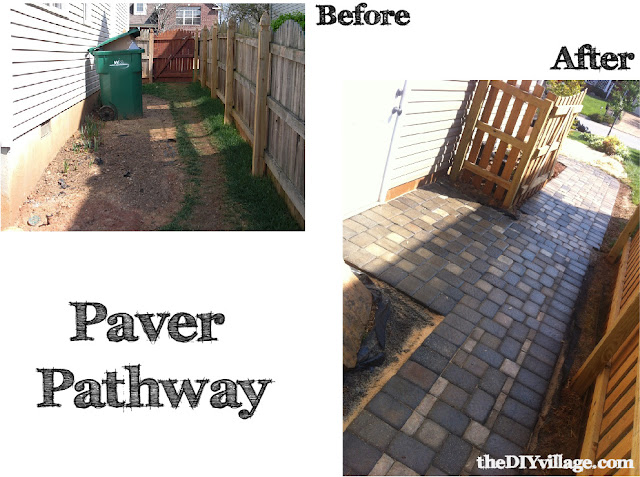
It looks amazing!! If I would have seen the before and afters without knowing I would have NEVER thought it was DIY!
LOVE this…I am looking at creating a patio outside and this is just what I want to do! Thanks for sharing! 😀
Thanks for stopping by and taking the time to check out our pavers! You won't regret installing a patio yourself!
Hi Matt! First of all this looks amazing. I would love to have something like this at my house. Secondly, you are so brave!! I would be terrified to tackle this big of a project. I like to stick to my furniture makeovers. That's a lot less scary. Congrats on a job well done!
XOXO,
Rachel
Rachel, I really appreciate your comments! I'm lucky that Jacque doesn't mind me making a mess, plus she trusts me to finish the project, even if there are some bumps (or sore thumbs!) along the way…And this is just the tip of the iceberg, we've been working on a landscape install over the last few months! I definitely see a series of outdoor project posts on the horizon!
Thanks again,
Matt
Oh, I am so inspired! It looks fantastic. We've been dying to put in a paver (or flagstone) path at our renovated church. I'm a little scared of all the work but it's clearly worth it!
That's awesome to hear we inspired you! Don't be scared to give it a shot, depending on the shapeof your path it could be alot easier to lay with a lot less cutting!
WOW! You've done a fantastic job! Your effort was well worth the outcome. 🙂
Sharla
Sharla, thank you so much for taking the time to let us know what you thought of our pavers! It's a great feeling to get such positive feedback from such talented people!
Thanks again,
Matt
You are featured this week on Busy Monday at A Pinch of Joy! We've installed a couple of paver walks and I have to say you did it well and you did it right! Very impressive. Hope you will stop by and grab a Featured Button. Can’t wait to see what other project you’ve been working on — hope you will link again soon!
Charlene, thank you so much for the feature!!! We are ecstatic over the response we've been getting for the pavers! We'll definitely stop by and grab a button, and we'll be excited to share more of our projects with you!
Looks awesome! We are wanting to DIY a circular paver area for a firepit. Your success is inspiring. 🙂
Becky Jane
Wow, that is amazing! I saw you at A Pinch of Joy and just had to comment! I'd love to do something like this (on a much smaller and straighter scale!) in our back yard! You're making it look very doable!
Carla,
Thanks for stopping by! We're honored to have been featured on busy monday by a pinch of joy! We'd love to see some pictures when you try it out for yourself!
Matt
Yea! It looks sooo good! I love that you gave it a border too. That really adds! I've done an entire patio like this before…I KNOW how much work it is! So job well done! It looks awesome!
–Katie
@ Creatively Living
Katie,
Thank you so much for checking us out! I'm thankful for feedback from anyone whose worked with pavers! I'm considering a patio in the backyard and am glad to have this experience under my belt!
WOW..that is some hard work, but like you said well worth it!
Looks great!
I love it!
I am so glad you came by to link up to the party at Embracing Change!
Please come back this week again! I would love to have you there!
Stacey of Embracing Change
Thanks Stacey, We'll be sharing again with Embracing Change real soon! Thanks for hosting!
Awesome tutorial! Kim's got a link party running tomorrow on The Better Half (http://www.oneprojectcloser.com/thebetterhalf) – this would be a great add there!
Thanks for checking out our paver path Fred! I missed last weeks link up, but Jacque and I have both submitted onto The Better Half this week!
Hey Jacque & Matt!!
Guess what?!
You guys gave me the Liebster Blog Award last month now I'm giving you the Versatile Blog Award in return!
I can't get enough of all your fun and fabulous projects!
Surely something to be awarded 🙂
Check out my site for more info and keep on being versatile!
XOXO,
Rachel
Oh WOW thank you so much Rachel! I am beyond excited about this award!
You rock!
Much Love
-Jacque
This turned out amazing! It seems extremely ambitious, but I'd love to try it myself!
I'm your newest follower!
You two have got some serious DIY going on at your house. I saw your trellis wall last week and stopped back by and noticed this amazing paver project! Love what you are doing here and congrats on your Newbie Spotlight!
-Lynn
Absolutely STUNNING for a DIY ! Sure you're not a pro..? Just joking, but that curve, oh my word, I would've settled on a plain square 😉 Well done, Matt!
Thank you so much! I wish I were a pro! Ultimately, my goal was to stay with it until I was happy with the outcome. The curve grew into more than I expected, but looking back, I wouldn't do it any other way!
Thanks so much for linking up for our Summer Before and After series! That sure was a lot of digging by hand!!! 🙂 Looks great!
Feel free to grab a button and share the contest with your readers!
It looks REALLY good! I've been wanting to do a paver patio area, but have been a bit intimidated by the amount of work it will take…but I haven't given up on it yet 🙂
Kristal, you're right, it is intimidating, but it really was worth the work. I've actually considered extending it all the way into our side yard. I'll probably wait until the fall though, it's way to hot here in TN!
Gorgeous paver pathway! We want to do a paver patio in our backyard… one of these days we will get to it!
Looks great but I have a few questions… what did you cut the pavers with when you needed to fit them? Are there a specific pavers to use for the rounded corners or did you cut those at an angle?
We used a 16″ concrete saw for all of the cuts. And as far as the rounded corners, those are just angled cuts. Depending on the size of the pavers being used, using a larger diameter angle grinder would allow you to actually round the corners.
That path looks SO great … wonder if I can inspire my hubby to put one in?! Nice work, Matt!
Keri, Every time I even walk on the paver path I remember how sore I was when I got done! Ha ha! But truthfully, I love how it turned out and am thinking about some more paver work! If you talk your husband into it, make sure to let me know! I’d love to see the results!
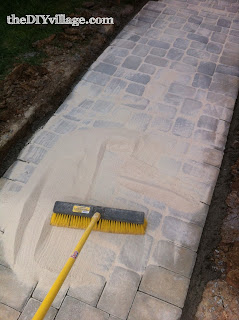
Hey, great job. We just bought my in-laws house and inherited a half-done job of pavers in the backyard. We’re having a problem with the sand my father-in-law put inbetween the pavers as the grains look too big to me and we are constantly stepping on sand. They never seem to be not covered in sand. Have you had any problems with your polymeric sand coming out of the spaces inbetween the pavers?
Caren, We have not had any problems out of the polymeric sand that we put in. When it’s installed, wetting down the sand is supposed to help “set” it…Obviously, it doesn’t set up like concrete, but it shouldn’t be popping out of spaces in between.
This looks so amazing!! Dust and minor injuries are worth it when the end result looks like this. 🙂
We started a project somewhat similar to this a number of years ago, but stalled out because the pavers we were using were discontinued. You have a couple in yours that’s similar to the size we used, and I was wondering where you purchased these from? I’m sure it’s probably not from a box store, but in case they were, I’d love to know. We only have 1/3 left to go on ours and it’s driving me nuts not to have it completed.
Hey Matt, What a fantastic job you did! Congrats! I’m in the middle of debating whether to pave my patio or hire someone. I’ve been reading articles and checking out websites and it looks like a whole lot of hard work. How did you determine how deep you needed to go and how much gravel and sand you needed? 3 Tons seems like a mighty lot lol. I’m planning to do an area around 11 X 13 and then set up our Gazebo on top.
Thanks!
Mike
Thanks Mike! I consulted with a local hardscape company, who recommended that I go with a 4″ base layer of crusher run. I found an online concrete calculator to figure the materials that I would need. You basically just plug in the length, width, and depth that you plan on putting down and it gives you an answer in cubic yards, which is how gravel is sold. So if you have an area 11×13 and you decided to put down gravel 4″ thick, you’re looking at needing 1.77 cubic yards. Sorry for the lengthy answer, but I hope that helps!
This looks amazing! We did a patio for our backyard but stopped and realized we need a walkway. Same issues mud pit, and just doesn’t look right. Thanks for the motivation we needed some to get digging.
It looks so great!! We’re starting on ours this weekend, and was so wondering how much you spent from start to finish?? Also what was the name/style of your pavers? Thanks:)
This looks AMAZING. Love it. You guys did a fantastic job. I can totally appreciate all of the hard work that went into this project. My husband and I are working on our own brick sidewalk right now, and boy is it turning into a major task! Our ground is rock hard red clay, so it has been extremely hard to dig down deep enough. If ours turns out even halfway as gorgeous as yours, I’ll be pleased 😉 Job well done you two.
Great job!! How much did the project cost? Looking to do this over a larger area and worried about the $$$.
Wow wow wow, you guys are an inspiration to all of us DIYErs! The pathway is amazing and the before and after comparison was too. I am about to begin a project of installing a few paver pads mixed into my existing xeriscape where the weeds are horrible. For some reason there are 3 areas that love to grow grass/weeds and I plan to break up the party with sand, weed barrier, pavers, and then polymeric sand over the pavers. I will have nice, pretty landing areas between my native plants and hopefully less weeds to worry about after the project is done! Thanks again for posting all the pics and instructions on how you guys tackled the pavers!
I’m also curious as to how much everything cost you. And also how many hours (approximate) it took.
I’m going to guesstimate for Matt. But including the time to pick up materials and supplies I would say it took anywhere from 40 – 50 hours to complete solo. Had he had my help (I was at work though 🙁 ) it would have gone more quickly.
Looks great! I’m on step 1 (moving 6 yards of dirt) and have ambitious plans. Please tell me your not a pro. 🙂
I understand the mechanics of the PVC for leveling, but can’t picture how exactly. Did you use 90 elbow joints and dig them in the ground? Doesn’t the weight of the 2×4 bow the pvc?
Thanks,
George
Wow! I am really impressed!! It’s exactly what I need at my home. I will pay you to put one in at my house!! I’m in Ashburn, VA. Not too far from you, right? 🙂
Thanks for sharing!!!
Wow this is so amazing! You did such a great job, looks very professional. I can’t wait for spring time, my big project this year is to build a paver patio fire pit.
How’s it holding up so far?
I am totally impressed by this project. Great job! I may just have to add a path to our side yard now. Thanks for the inspiration!
This is gorgeous! I’m sure your backs were hurting, but you have to be so proud of how it turned out! Can’t wait to show this idea to my husband!
Enjoy your weekend,
Jen @ http://www.notinggrace.com
What a beautiful path you created! Thank you for the tutorial! I can’t wait to make a smaller of version of this in my yard!
This is a really great guide! I can’t stress enough the importance of ensuring that your path is level before you lay the pavers, bricks or stone. Otherwise, your paving brick walkwaycould buckle and become uneven.
Your paver turned out great . Looks awesome.
I think it’s impressive how you got the brick pathway to curve like that. Pathways of this nature are already hard enough to construct, but it looks like you have mastered yours. Do you feel like a brick pathway is even more challenging to make than a concrete one?
Amazing post. Now I have an idea for our muddy pathway. No need to hire paving contractor. Thanks for sharing this.
This looks outstanding! Where did you get those pavers?
They were purchased from a local nursery.
You guys did an amazing job on this!
Hi- This walkway looks fantastic! I want to do something similar for a back patio. How has it held up over the past 5 years? Anything you would have done differently? Thanks!
Thank you, everything still looks great! I’d say the only thing Matt would have done differently would have been to pick a less complicated pattern.
Absolutely gorgeous! I want to thank you for a different reason. I’m a woman in my fifties and I was toying with the idea of laying down pavers myself and your experience convinced me not to do it. Thanks again.
Good work with the curved pieces I would have never thought you had to cut the actual pieces so they curve like that. Thanks for writing!
Absolutely beautiful!
I’m writing from Lebanon.
Wow I’m so impressed. I can’t believe you did this on your own. What a wonderful result, it’s truly a work of art! I can’t stop looking at it!
I took a few screen shots just for my own viewing pleasure. Coz I Definitely won’t be making this.
And it’s so valuable… i hope you won’t be moving soon unless you can take it with you.
Wow I love it!
You have done a great job Matt! The pathway is looking beautiful, strong and solid, a perfect labor of love. Thanks for sharing all the pictures of the entire process.
Wow! Your paving looks phenomenal. I love it. Great DIY for this one. Keep it up!