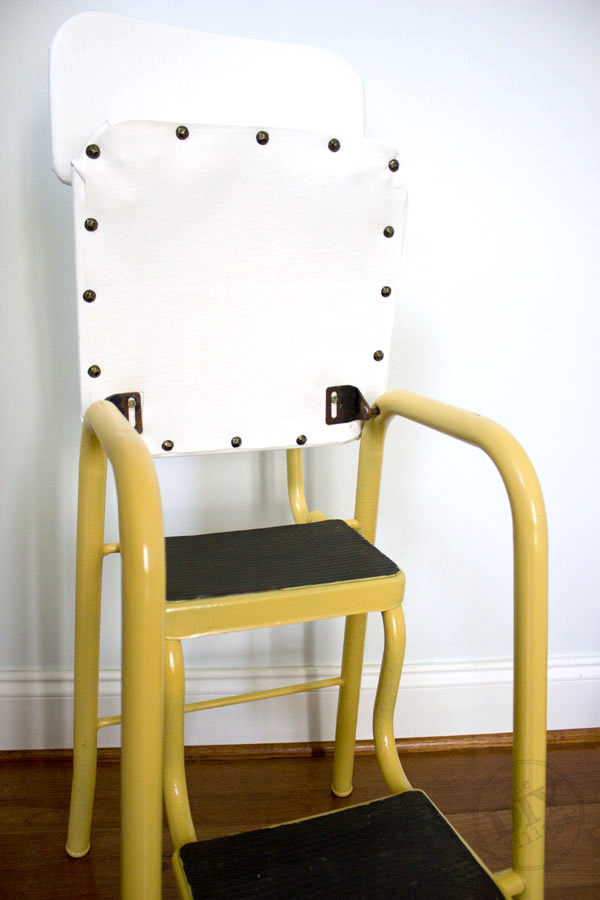
A few years ago, while driving back to work from my lunch break, I spied a very cool but sad looking vintage step stool sitting at the end of someone’s driveway next to their trash. I passed by, but it didn’t take me long to circle around the block and come back to pick up the stool. Unfortunately the step stool stayed untouched for at least 4 years. This time it wasn’t in my garage, I left the sad step stool in the back room of my office. Good thing I’m the only one who goes back there! I finally decided it was time to show this little vintage step stool some love.
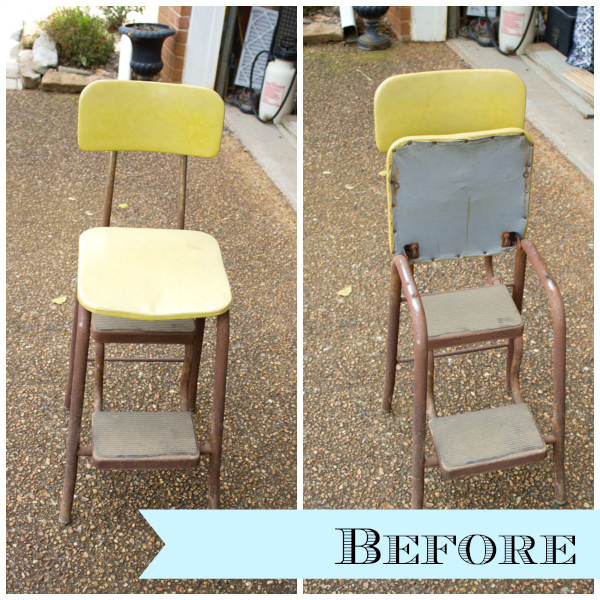 The structure of the step stool was in fairly good condition, but COVERED in rust. In some areas thicker than others. I considered using a sand blaster to remove the rust. And while it is a fast effective method, it is not practical for everyone. After much thought I finally decided on a 3M sanding disk that attaches to any drill. Let’s get to it shall we?
MATERIALS
– Painter’s Tarp
– Spray Paint (Valspar – Golden House)
– 3M Paint & Rust Stripper Drill Attachment
– Painters Tape
– 1/2 yd of Mariners Fabric
– Decorative Upholstery Tacks
– 3/4″ Plywood
– Flathead Screwdriver
– Pliers (optional)
– Jig Saw
– Hammer
– Drill
– Small Drill Bit (optional)
– Damp Cloth
– Safety Glasses
Instructions: Wipe down the stool (or whatever you are working on) with a dry cloth to remove any excess dirt or rust that might be chipping. Also remove the seat and back to your stool if applicable.
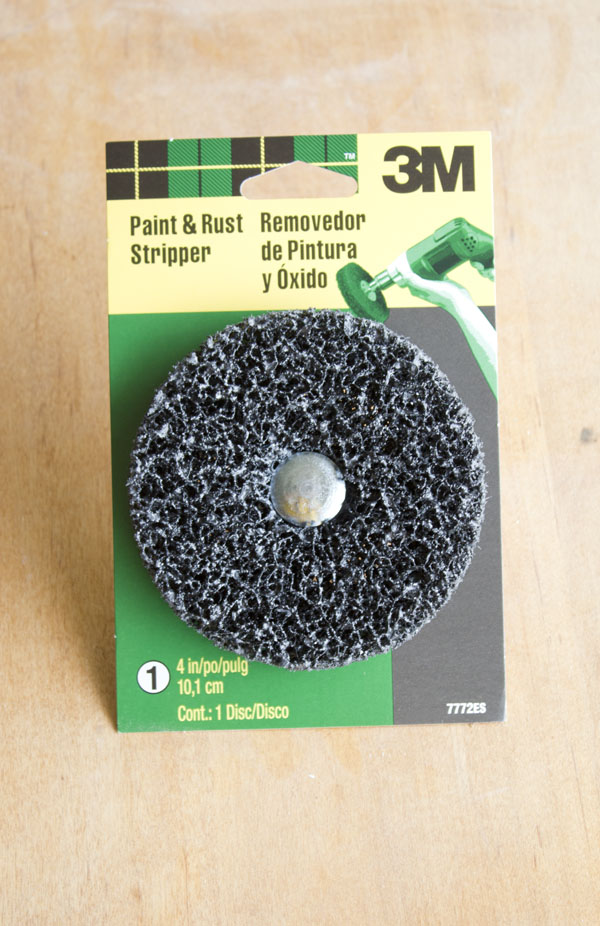 Attach the 3M Paint & Rust Stripper wheel to your drill. Start your drill and apply some pressure. The amount of pressure needed will be determined by the thickness of your rust. You should be able to tell how much you will need once you get started. Make sure to have your eye protection on when you start removing the rust.
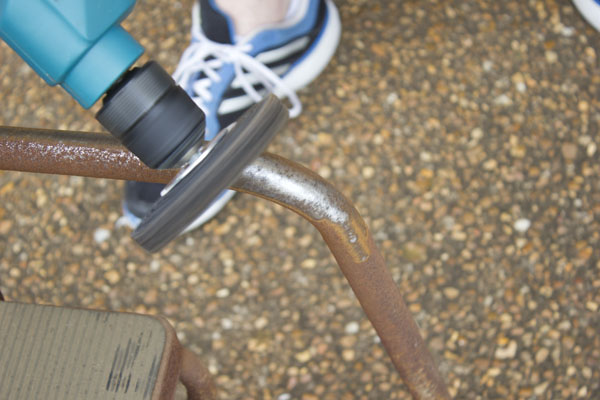 Once the rust is removed you can test the smoothness of the metal by running your hand over it gently. If you find rough spots you can to back and take more of the rust off. Take a damp rag and wipe all surfaces on the stool including the step treads.
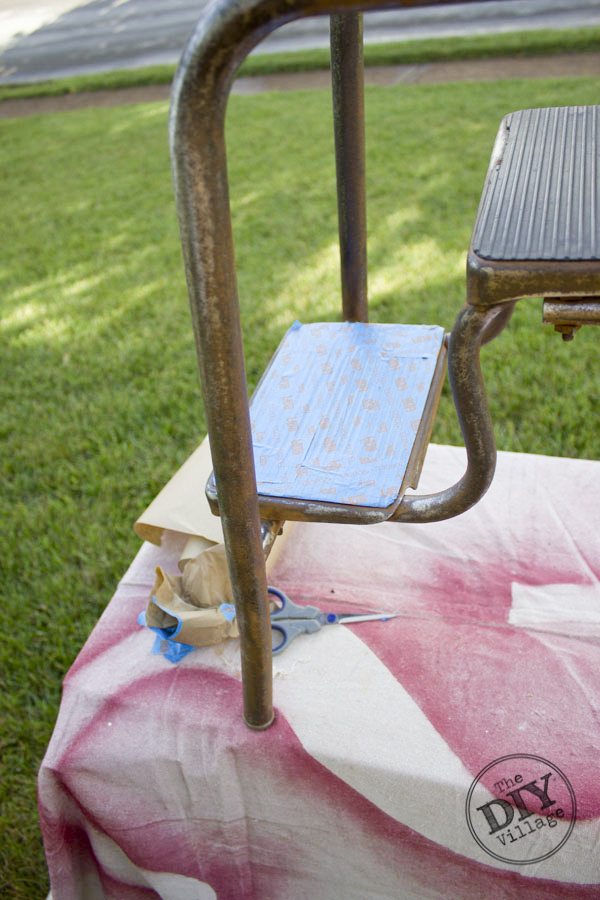 Continue prepping your stool for paint by taping off the treads with painter’s tape.
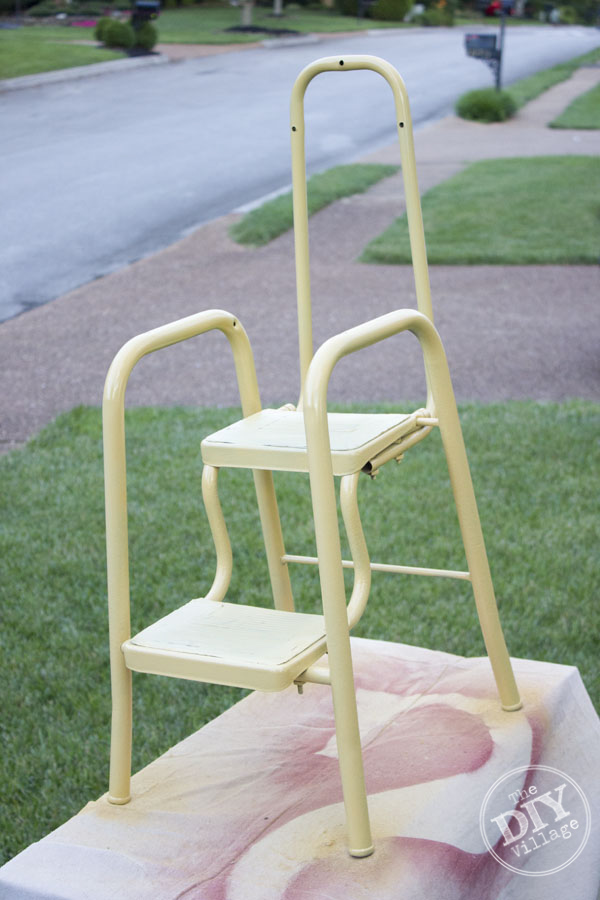 Apply a light coat of paint making sure to avoid any drips that can be caused by over-spraying the chair. Our stool took two coats to get complete coverage.
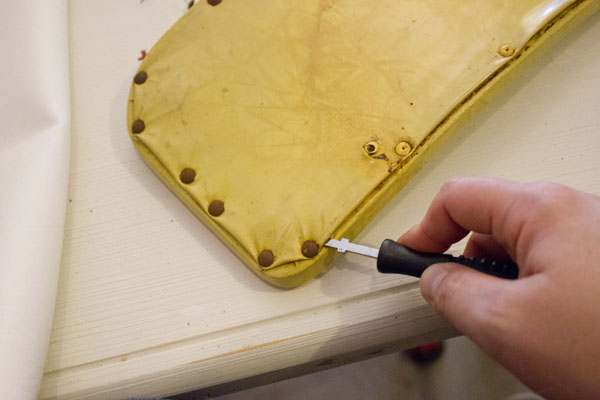 While your paint is drying, remove the fabric from your seat back. Use a flat head screw driver to get under the old tacks and pry them up. I could not find our small flat head so I used our irrigation head adjustment key (sometimes you just have to improvise). Use the pliers to pull the loosened tacks out.
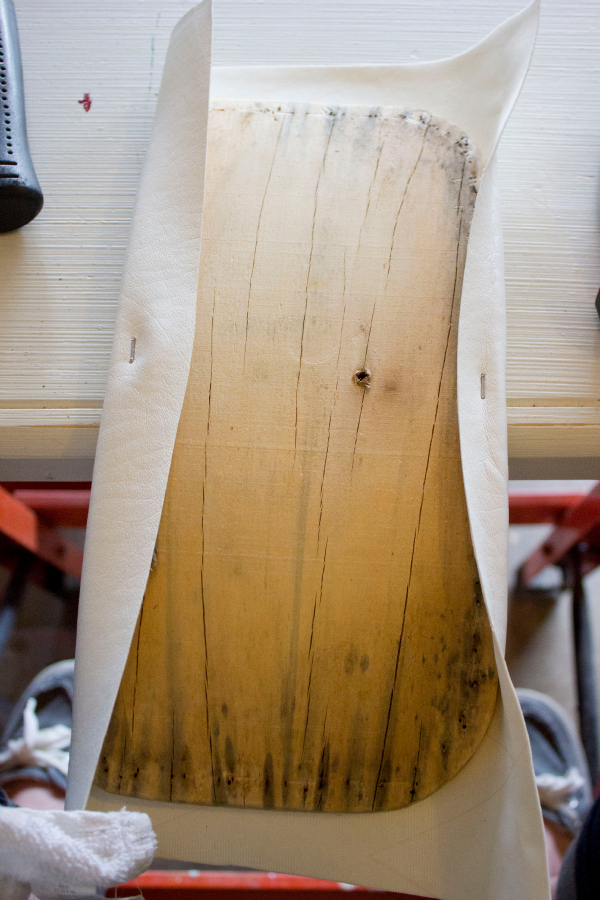 Prep the fabric by cutting it 1 – 2″ wider than the outside of your seat. Start upholstering the seat by putting one staple in the center of one side of the board pull the fabric taught and add a staple to the opposite side. Continue down one side of the seat stopping about 1″ from the corner. Do the same to the opposite side of the seat.
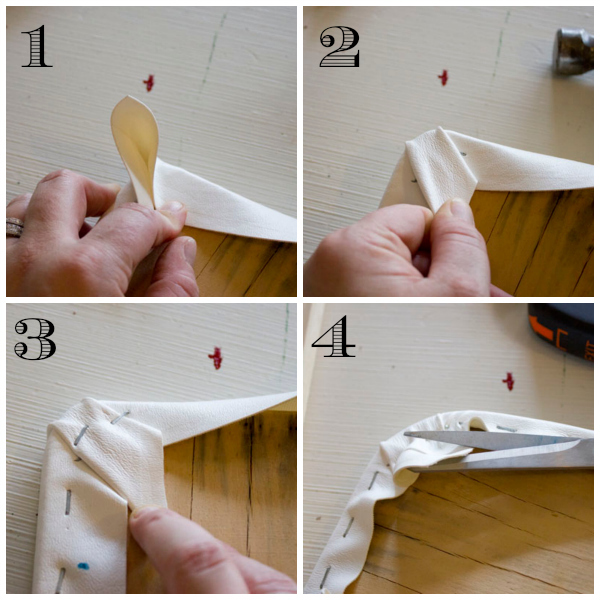 Now you are ready for the corners!
1. Using your fingers to hold the fabric taut, create an ear like tab and add one staple to each side of the tab.
2. Hold the end of the tab and pull the tab flat to the back of the board.
3. Making sure to keep the fabric taut, add 1 – 2 staples to secure the corner.
4. Cut away excess fabric.
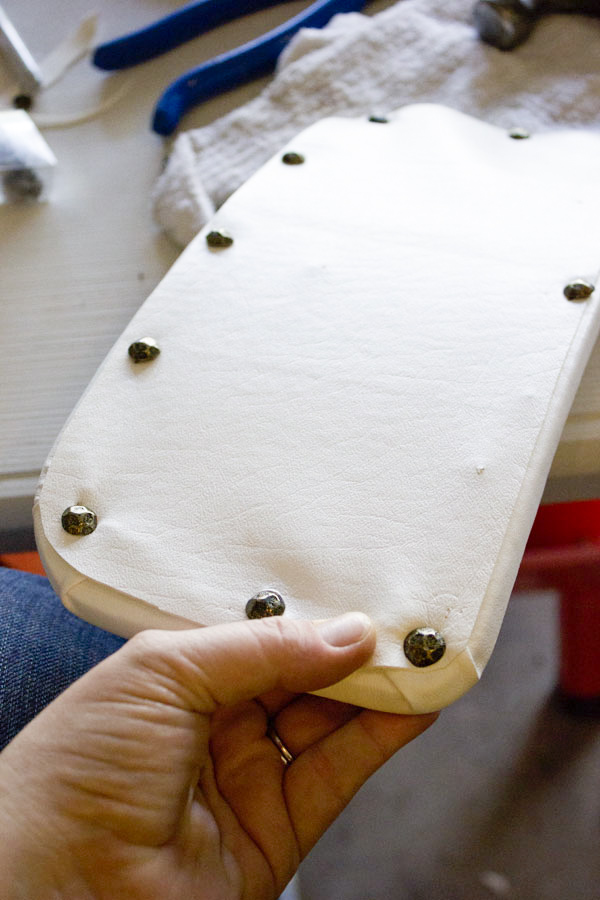
To cover all the staples, cut a piece of fabric roughly 1/2″ smaller than your seat. Use decorative upholstery tacks every few inches to hold the fabric in place. Keep in mind where the seat will be attaching back to your stool and make sure to leave adequate spacing for your screws or you will have to remove tacks to be able to re-attach the seat. If you use mariners fabric, you can leave the raw edge exposed since it won’t fray. Bonus, the fabric is waterproof and very easy to clean. If you are having trouble getting your tacks to go into the wood with out bending, you can pre-drill your tack holes. This will save you a lot of headache in the end!
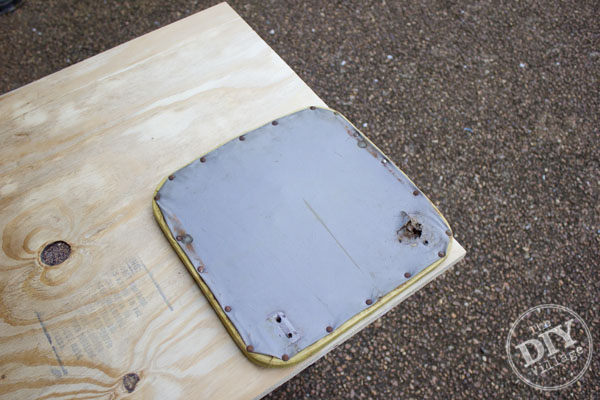
The bottom seat of the step stool was beyond repair and rotted out. Using the old seat as a template trace around the seat onto a piece of plywood.
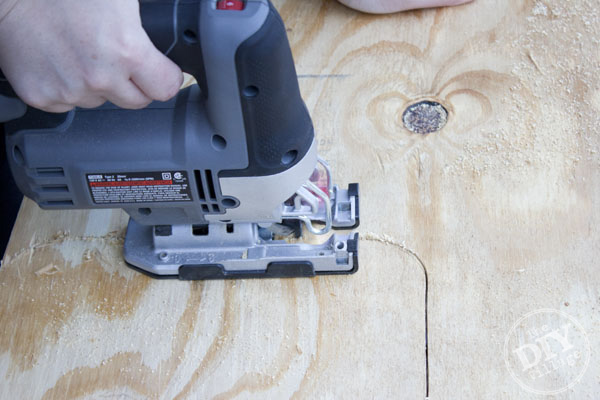
Use a Jig Saw to cut the new seat and upholster using the same steps listed above. When your seat is complete and the paint is dry re-attach your seat.

Can you believe this is the same stool?
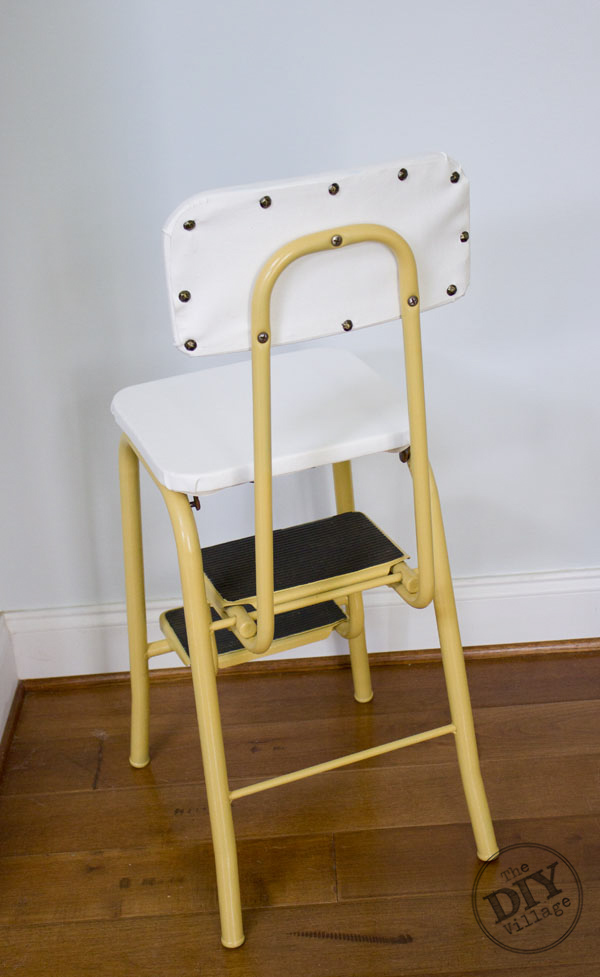
The white and yellow really pop! The paint and rust stripper disks really gave the vintage step stool a new life. I am still amazed at how smooth the finish came out!


Thrifty Spooky Halloween Corner from Redhead Can Decorate
Framed Mirror Tray from 2 Bees in a Pod
Step Stool Makeover from Bliss Ranch
Fall Leaf Candleholders from Chatfield Court
Thrifty Homemade Candles from Cottage at the Crossroads
Painting an Antique Cabinet in a Bold Blue from DIY Beautify
Fall Crafts Using Spray Paint from Duke Manor Farm
Fishing Basket Turned Fall Door Decor from I Should Be Mopping the Floor
DIY Hanging Basket from a Placemat from Jennifer Rizzo
DIY Watercolor Sheet Music Leaves from Postcards from the Ridge
Tomato Cage Pumpkin from Salvage Sister and Mister
Embroidery Hoop Halloween Wreath from The Creek Line House
Vintage Kitchen Counter Step Stool Makeover from The DIY Village
Halloween Letter Board Ghost from The How To Home
DIY Halloween Candy Dispenser with Jack O’ Lantern Eyes Printable from Unskinny Boppy
Simple Eucalyptus Garland from What Meegan Makes
What a fun pop of color and I really like the tacks you used!! Great job!
Wow wow wow! You worked so hard to create a whole new, fresh look. With all the rust and cracked vinyl, I don’t think I would even want to attempt this. It looks amazing!
Whoa! Talk about an incredible transformation!! I would have never guessed it was the same stool! Fabulous!
Jacque- what a super transformation. sadly the owners couldn’t see pass the rust …but you did! I remember my grandparents having a stool like this back in the day.
I am truly amazed and impressed with this stool make-over! It looks fabulous! I have been known to buy things and stick them in our storage building where they sometimes stay for years!
Great article 🙂
Thanks for posting!
I love that sturdy old school stool! Its a real statement piece and the color combo is awesome.
Good idea and work! I have a similar chair in my workshop. I will try to revive it, but only in black and red colors.
Wow! I love the transformation!
Great result!