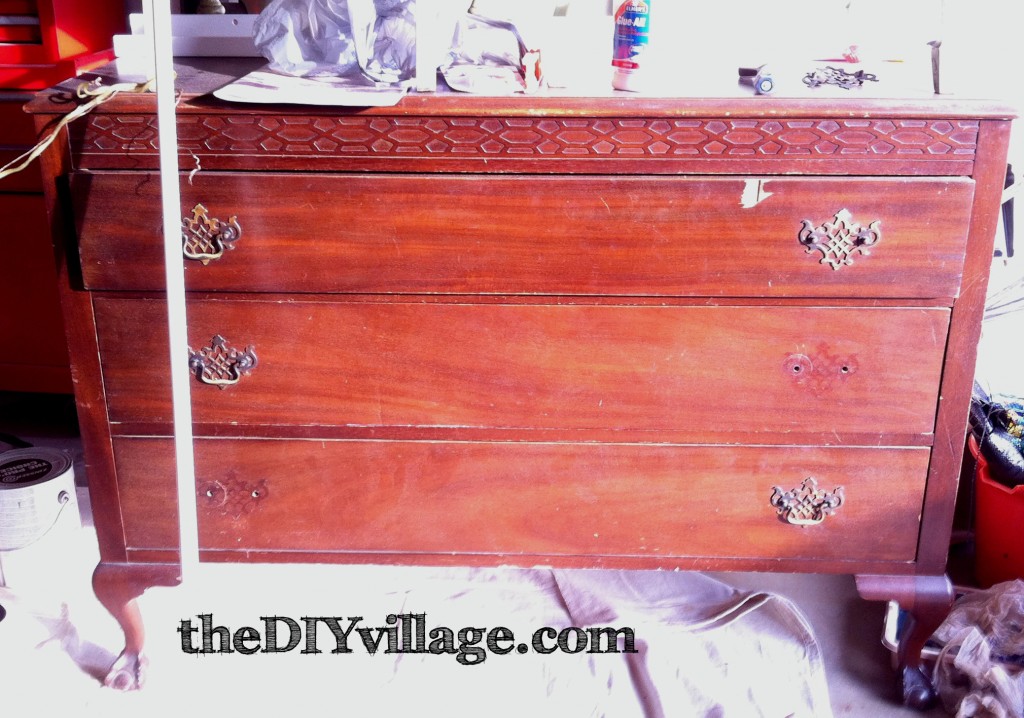
 Jacque and I stumbled upon this dresser while we were on a Craiglist run one Saturday earlier this year. We somehow managed to bundle this dresser, a set of stools, and a chair all from one household. This piece was in desperate need of an overhaul, and we were just the couple up for the challenge! It had just enough gouges and imperfections to meet our standards! And that honeycomb detail on the top was just too cool to pass up!
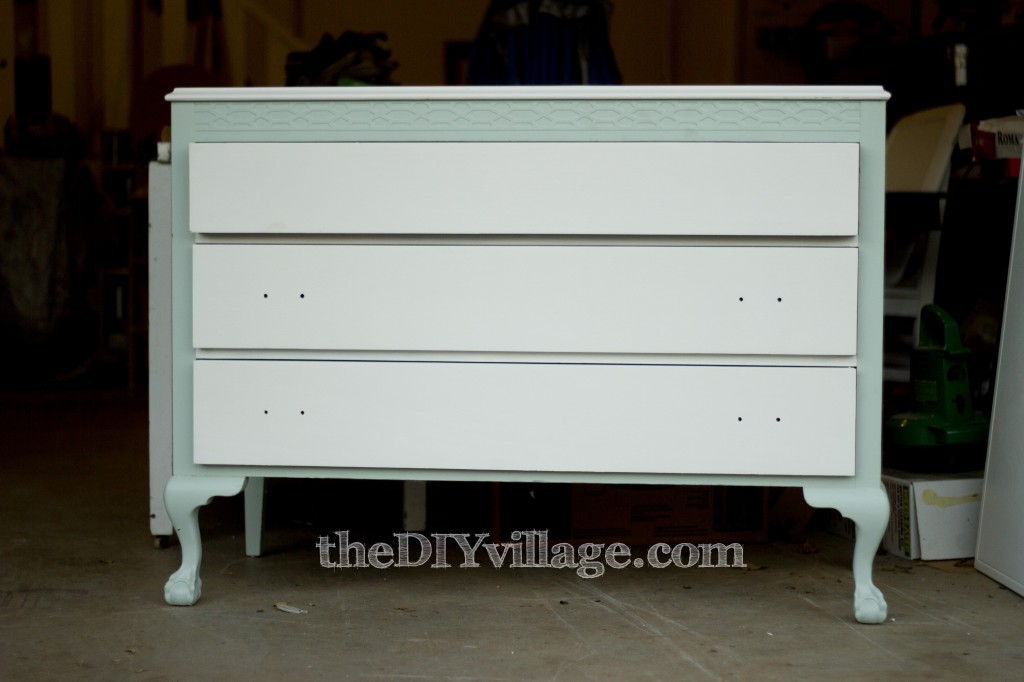
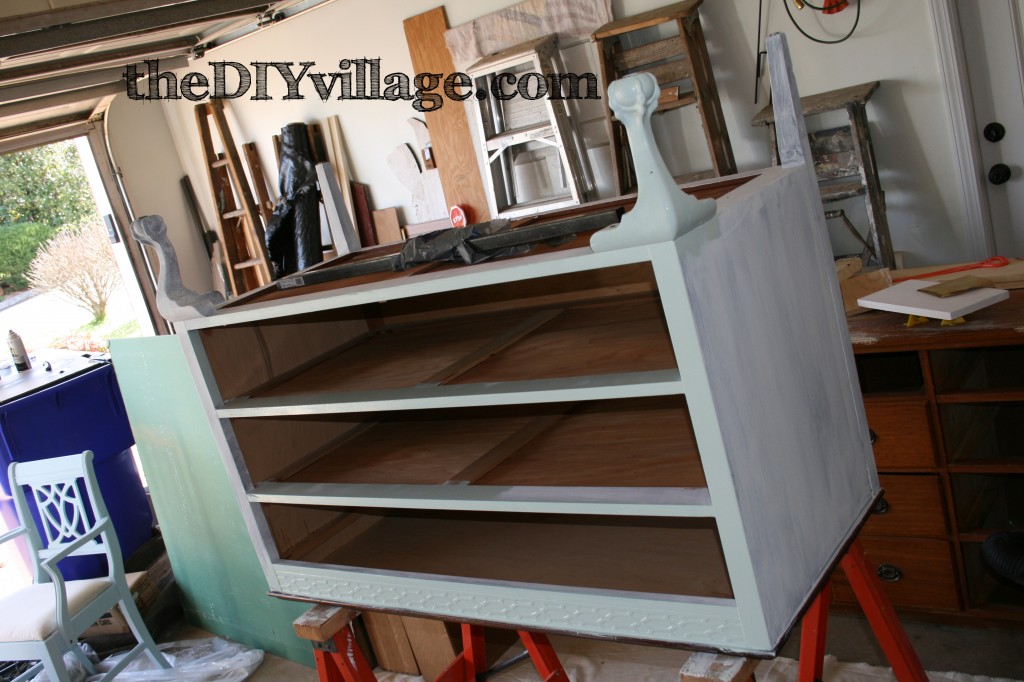
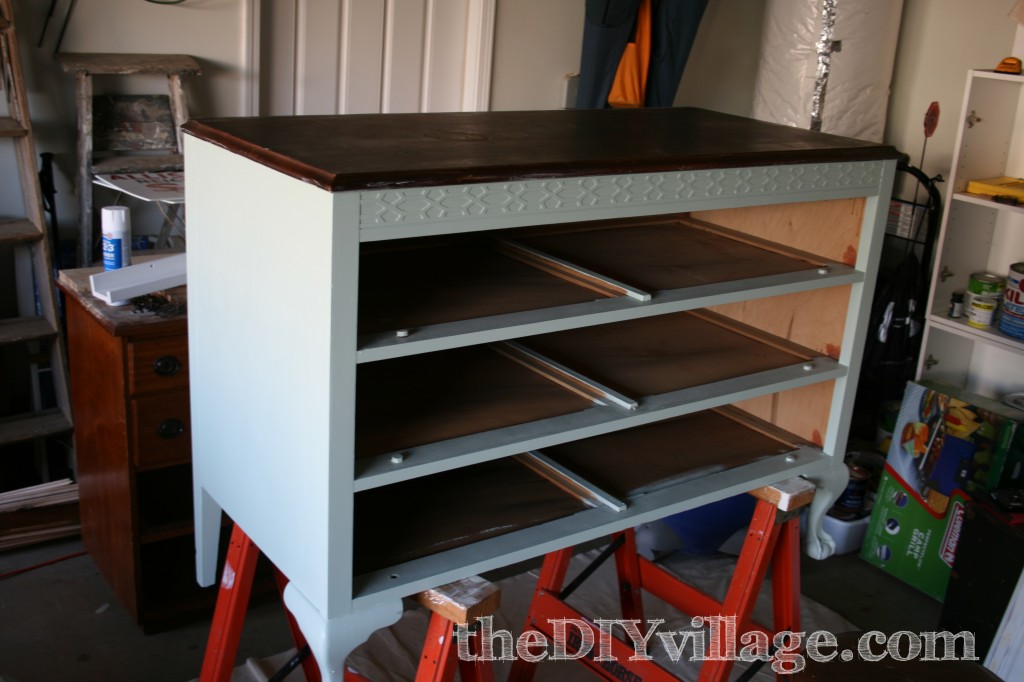
Shortly after getting the dresser home, we threw a coat of Zinsser Oil Based Primer onto the frame of the piece.
Looks pretty good doesn’t it? While I wish that was the case, what you can’t see in most of these pictures is the imperfections on the dresser top and the drawer fronts. (Head over HERE on using Bondo All Purpose Filler to correct any and all imperfections in your furniture projects!) Instead of being able to stain the drawers and top the dresser I opted for contrasting paint colors.
A few coats of paint later and we had achieved the look I had originally set out for…A classic, simple two tone paint job. But, once we were done, I couldn’t help but feel like this piece deserved more.
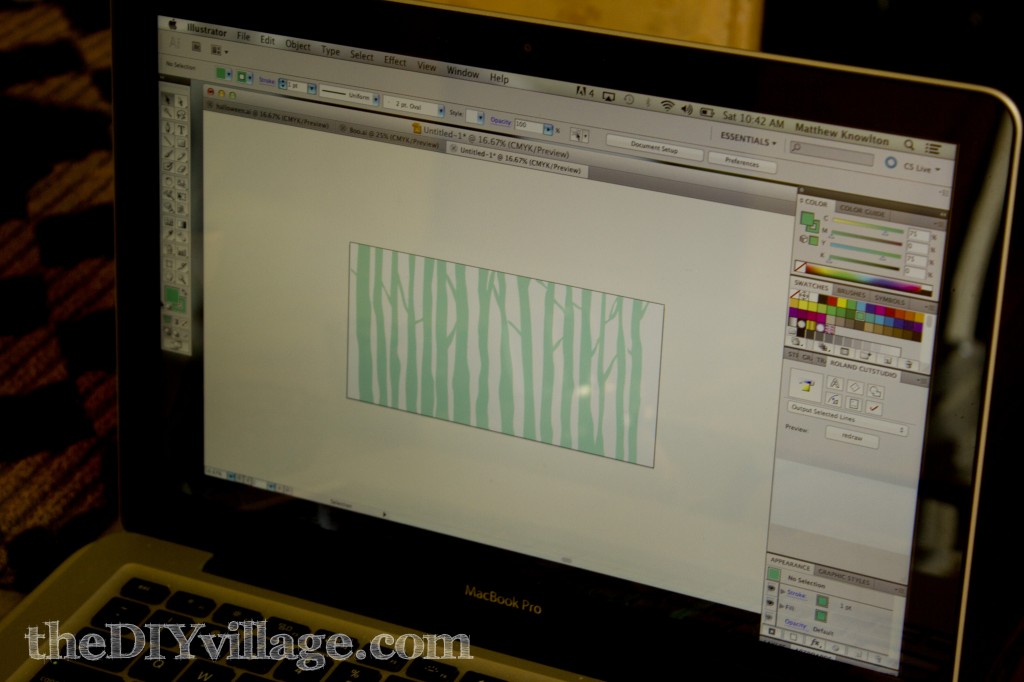
So I went back to the drawing board…Literally! I wanted to work on some kind of modern artwork that I could display on a piece of furniture, so I figured I’d give it a shot on this one! Using Adobe Illustrator and my Roland GX-24 vinyl cutter, I was able create a stencil out of vinyl. I used a similar stencil idea on my Word Art Dresser earlier this year and absolutely loved it, so I figured I’d role the dice on this one!
Here is the drawing I worked up on Illustrator. I got my inspiration from a woodland painting I saw in a shop a few weeks back.
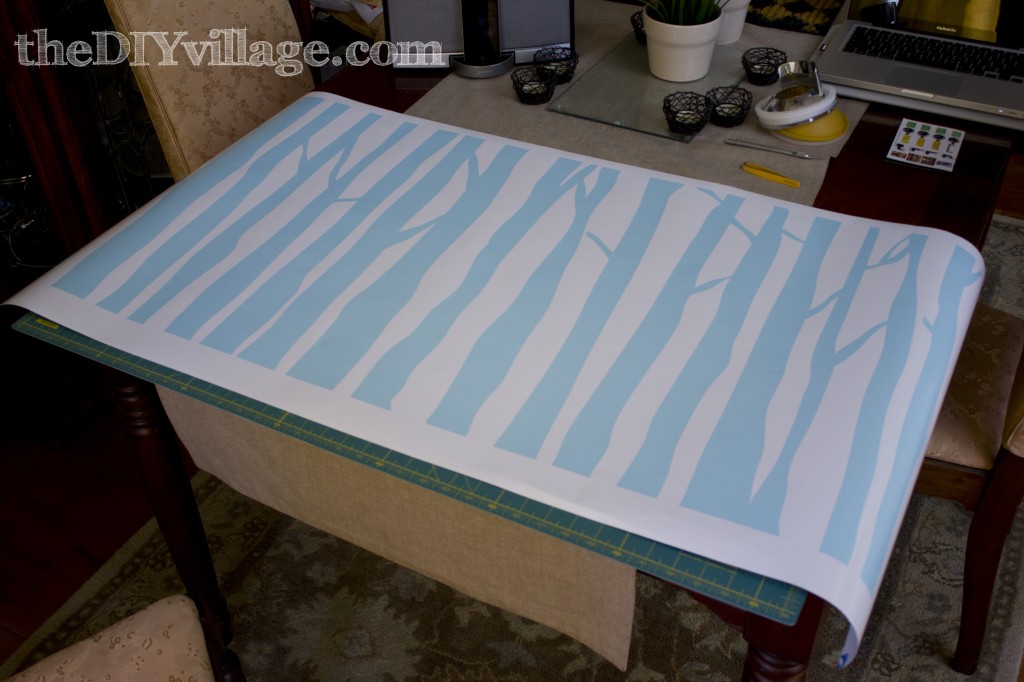
And here’s what my woodland vinyl cut out looked like! By far the biggest vinyl appliqué that I’ve used on a piece of furniture to-date.
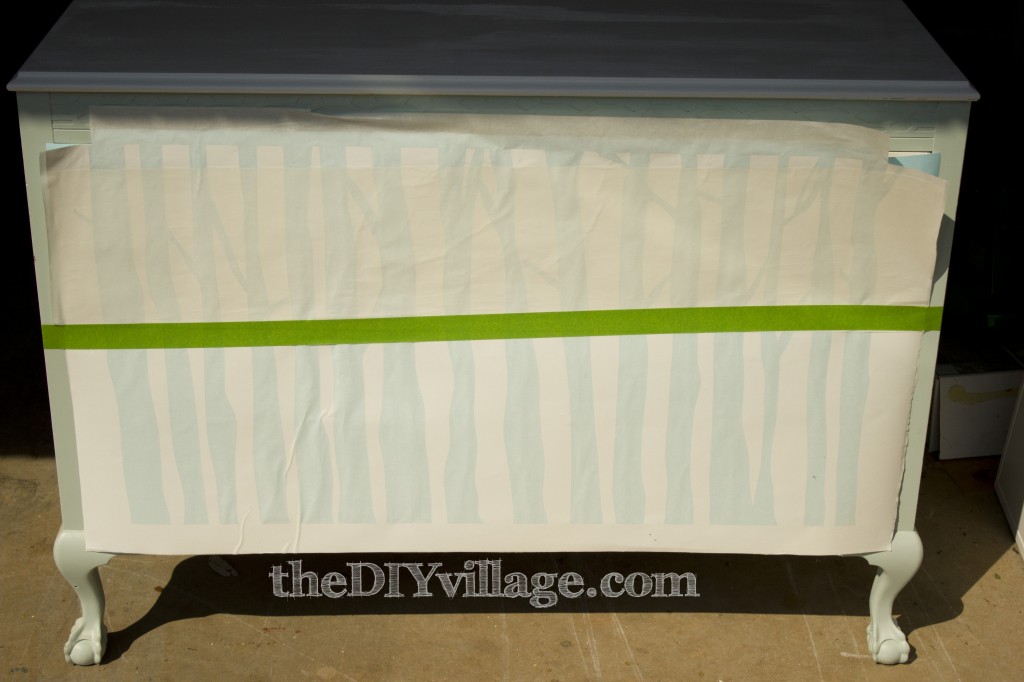
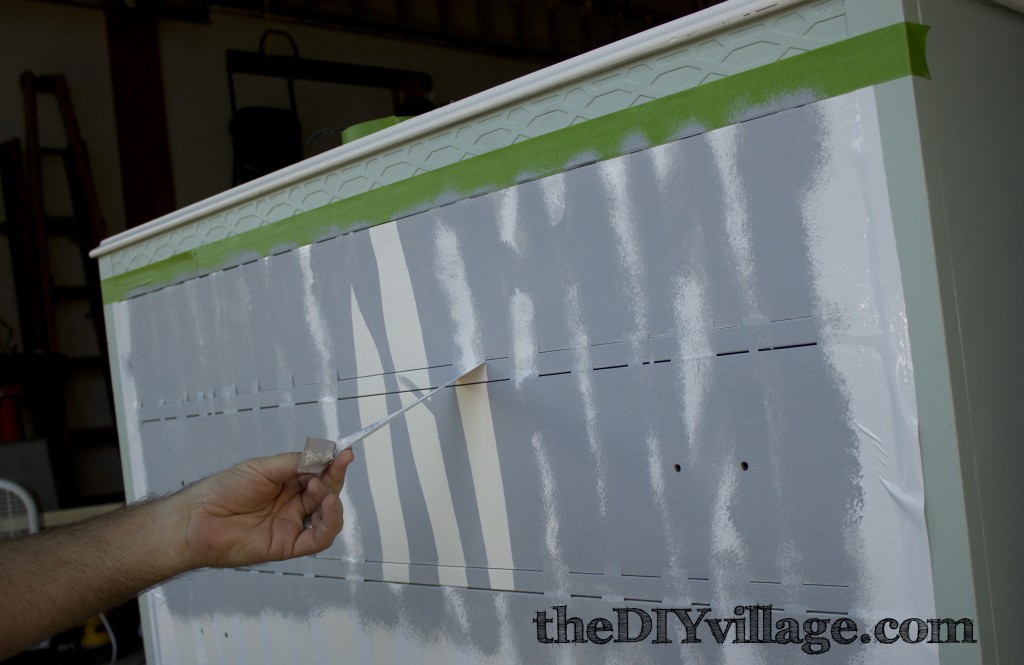
I applied transfer tape to the woodland vinyl cutout and positioned it on the dresser front. The FrogTape that is running semi-horizontally is used to divide the stencil in half. The next step is to separate the transfer tape (and vinyl) from the backing. I prefer to let the transfer tape and vinyl hang down over the tape as I cut away the backing from the top section. This particular method not only holds the stencil in the proper position but allows better control while removing the backing paper. Starting right above the tape, I grabbed a squeegee and gently worked the transfer tape and vinyl upwards against the surface of the dresser. Once the top section was set, I removed the piece of tape and repeated the process on the bottom half.
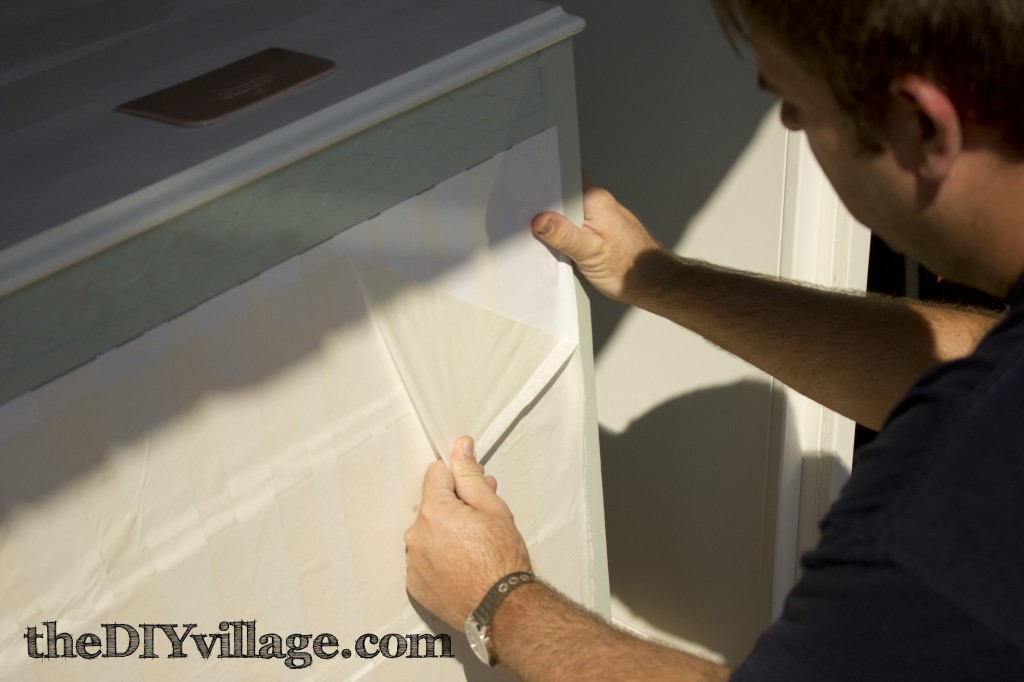
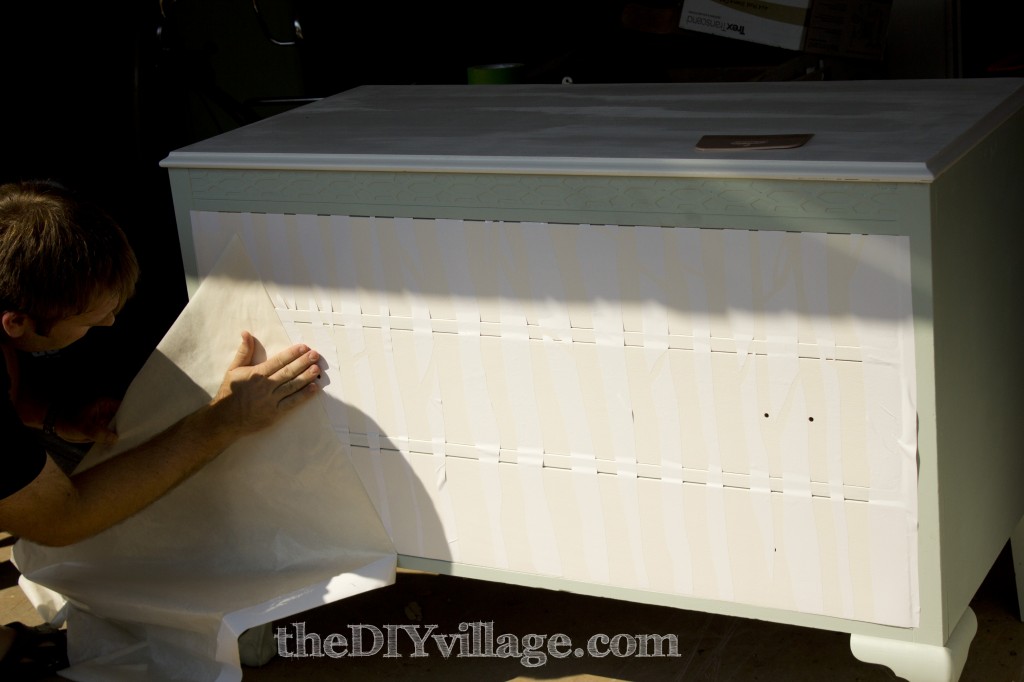
In order to use the stencil, the last step is to remove the transfer tape. I started at the upper right hand corner and began separating the two, almost folding the transfer tape back on itself as I worked my way across the dresser. (Take your time with this, make sure your vinyl is releasing from your transfer tape and sticking firmly to your dresser.)
Carefully run your squeegee over your vinyl to make sure all of your edges are flat and sealed for paint.
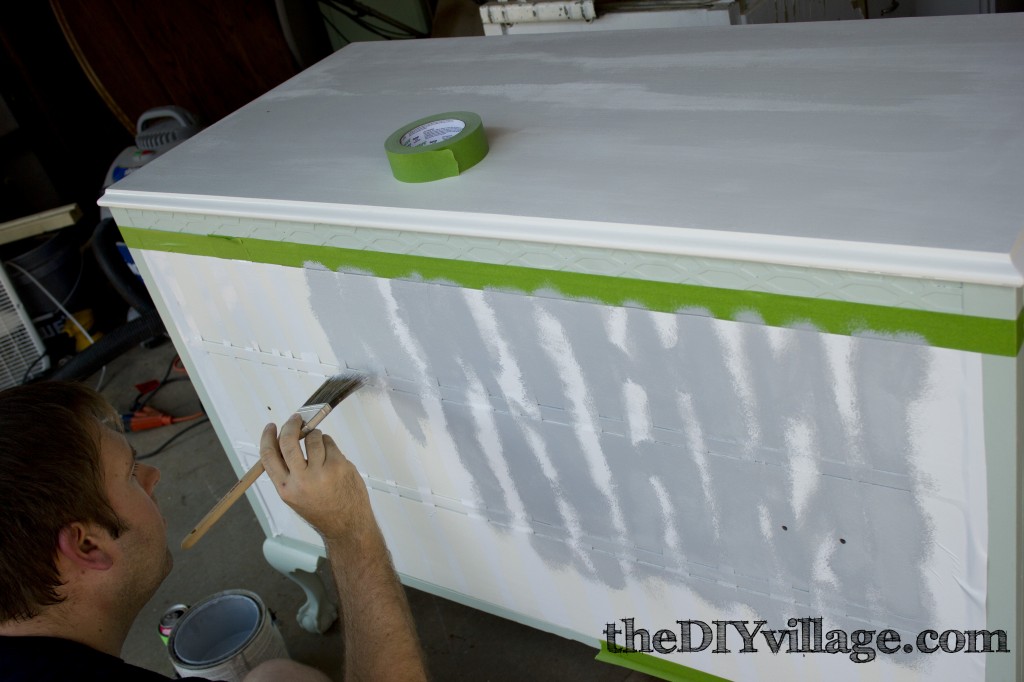
I reused the FrogTape at the top and bottom of the stencil to keep from painting on any surface that I hadn’t intended to.
When painting, I use a quality paint brush and get small amounts of paint on the brush and stipple over the open areas around the stencil. This technique takes a little longer, but since you’re not dealing in gobs of paint, you don’t have to worry about runs.
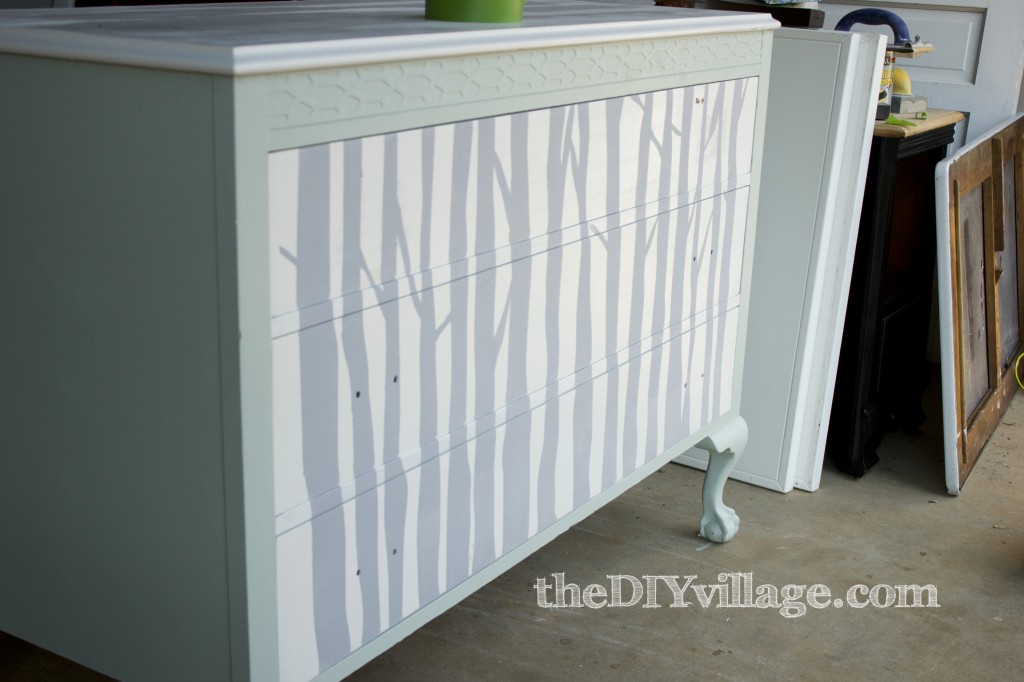
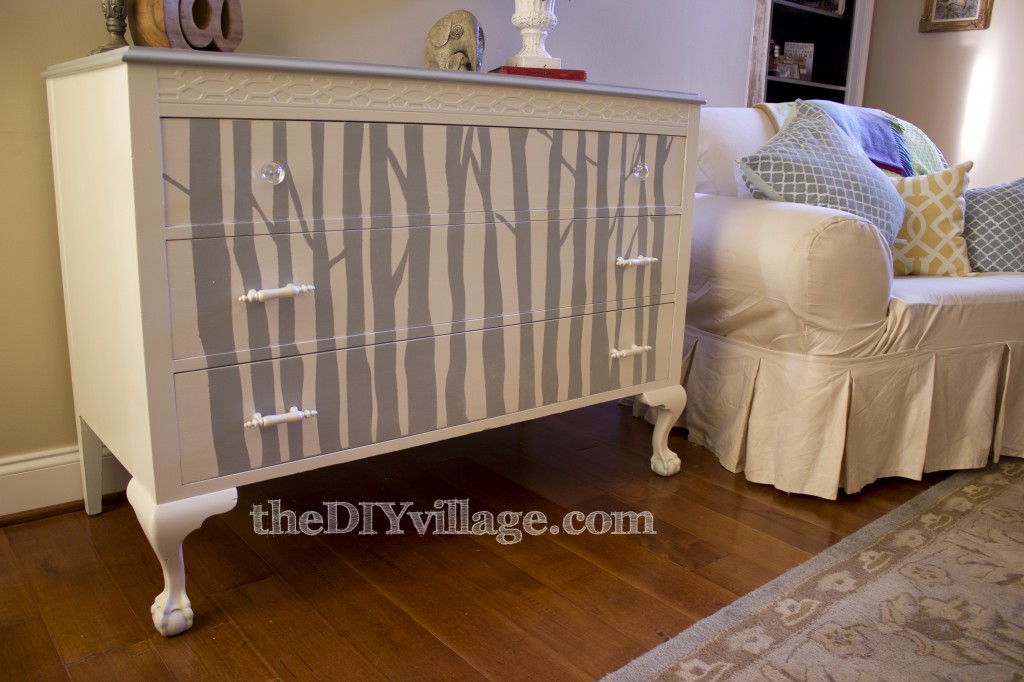
Once the painting was finished, I began to carefully peel the stencil off the dresser, leaving me with my desired woodland look!
Although I liked the color combination of the light green, gray, and white, I just wasn’t satisfied with the overall look of the piece. So I called in the reinforcements! Anytime I’m stuck on where I should go with a project, I turn to my better half! Jacque has a knack for seeing the details that I seem to miss. As great as the stenciled image looked, some of the dressers’ details were now lost. The honeycomb detail and the claw feet had lost their pop! So we came up with a few color options and Jacque sold me on one of them.
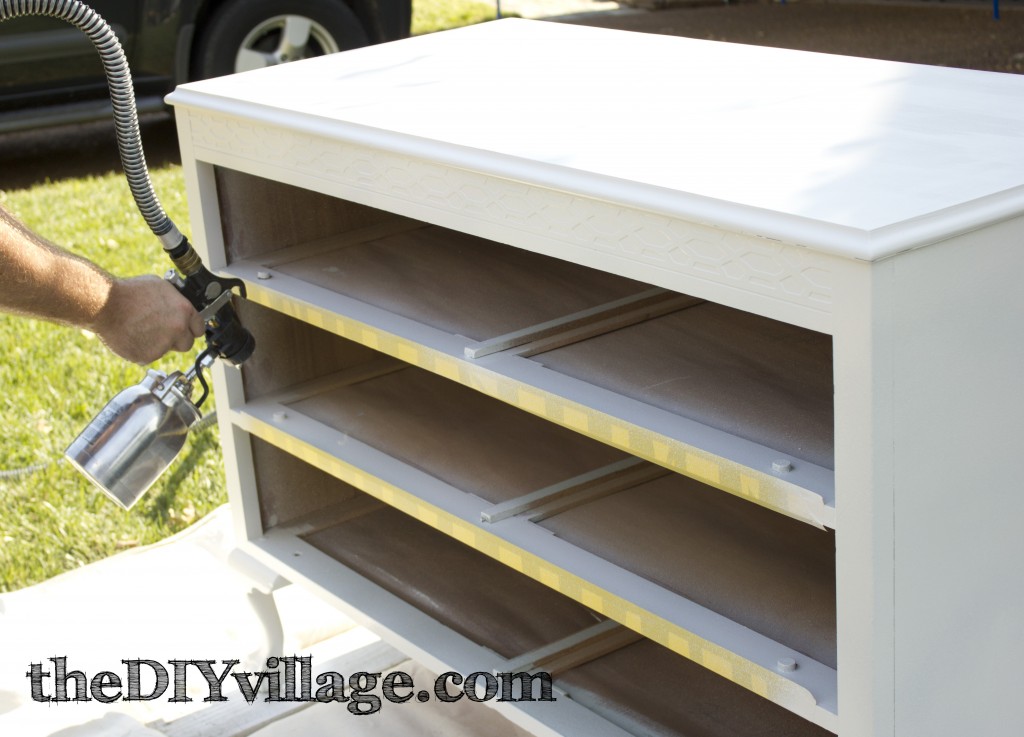
Much to my surprise she suggested I change the entire look of the outside of the dresser. (I am pretty sure she consulted with Rachel over at Thrifty Inspirations again, two minds are better than one right?) With paint of course! Thank goodness for our HVLP Sprayer, it made re-painting quick and painless!
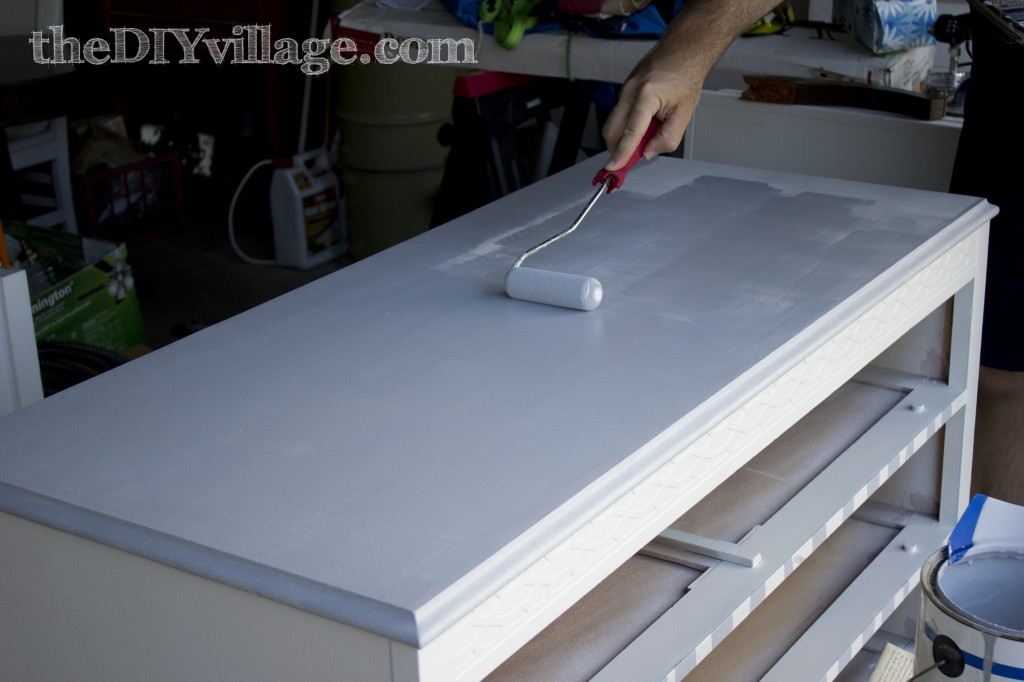
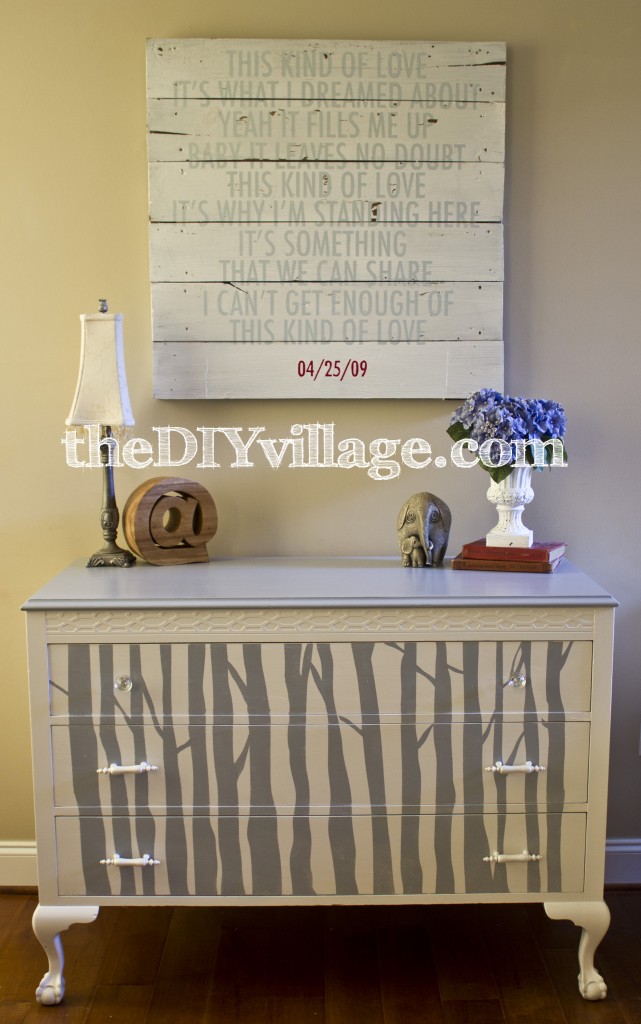
With the body of the dresser now painted white, I painted the top of the dresser the same grey as the woodland theme on the front.
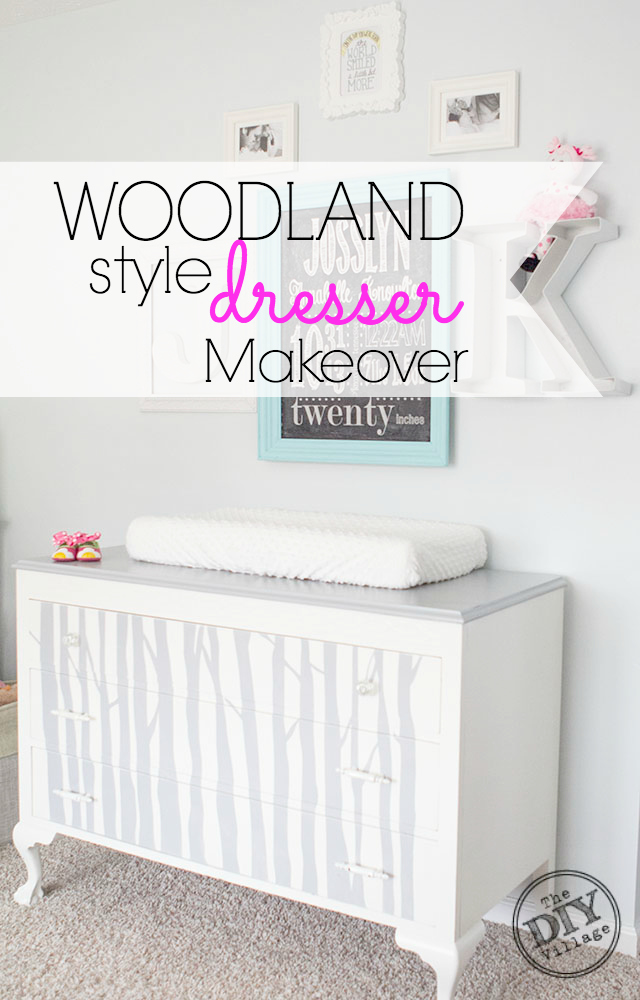
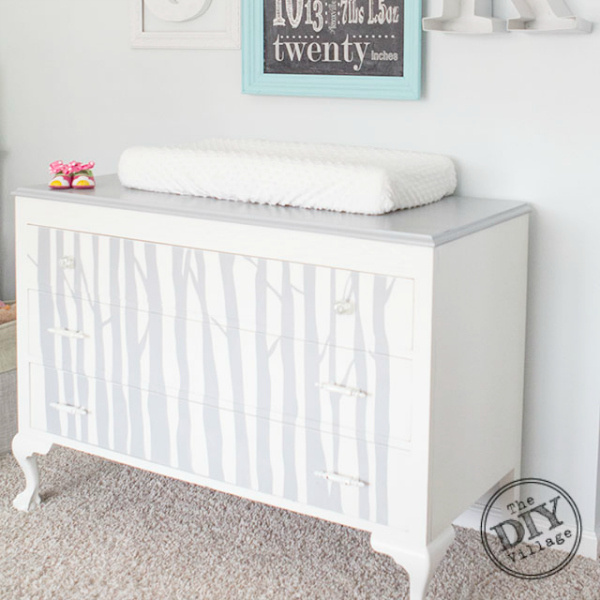
We finished off the dresser by adding some new hardware and moving inside. The new color combination was just what this woodland dresser needed!
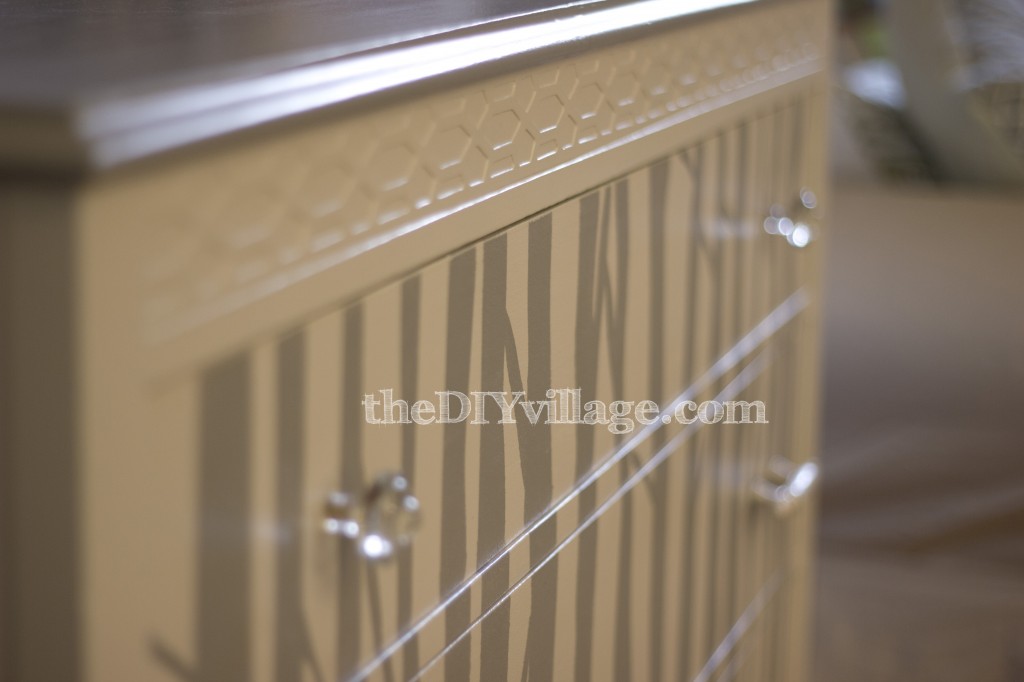
I love the intricate detail on the dresser front!
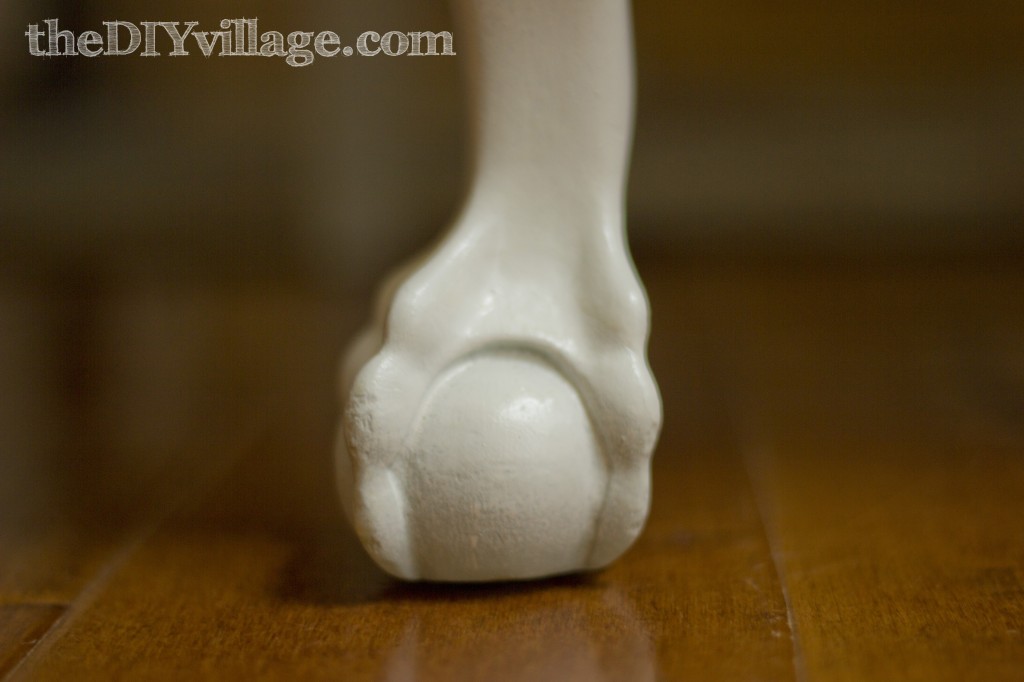
These claw feet are absolutely gorgeous!
This piece has made quite a transformation and I am really pleased with the outcome of our woodland themed dresser. I think it would work great in a living room, bedroom, or even in a nursery.
Have you ever taken any risks with projects that paid off? Let us know!
What a beautiful work of art! You and your wife make a great team! I’m green with envy over this little jewel.
Jeanette, I am definitely thankful for Jacque! She makes these projects a lot easier for me! Thanks for taking the time to let us know what you thought of our latest piece!
This is amazing!! You guys are soo talented! Love it!!!!
Thanks Ellisann! I’m pretty lucky to have such a creative and inspiring partner! Thanks for the feedback!
You caught us Matt! I may have had a liiiiiittle bit to do with the color change but I’m so glad you went for it! It turned out perfect. If you sell this, I will kill you. K? 🙂 Jacque never showed me the feet on it, they are AMAZING! Don’t forget, sell it and die 🙂
XOXO,
Rachel
🙂 Rachel, I can’t make any promises, but…I’d rather not die! Thanks for the help!
It looks amazing! We have a woodland themed nursery and I so want this dresser in it now! Love the white and grey combo.
Thank you so much Kelly! I would love to see your woodland themed nursery!
Beautiful! Love the colors and the door pulls you chose too!
Thanks Diane! Those pulls are from Hobby Lobby! I found the shape I was looking for and painted them with a pearl finish so that they’d go with the new look!
I LOVE it! Off to pin….
Stacy, thanks for the pin! I’m glad that Jacque talked me into the new colors! It was definitely a rare find!
Oh my, you’ve done it again, love this piece, well I love both pieces. You really do beautiful work, your are a great team in more ways than one! What can I say gor.geous! Thanks for sharing your creative inspiration with Sunday’s Best – you helped make the party a success!
Thanks Cathy! I’m really glad that you liked it! It took us some time to get it right, but I can’t imagine changing a thing on it now!
This looks amazing! Seriously in love with the claw feet!
Katie, thanks for the feedback! It was definitely a departure from the norm for us, but I’m glad we took a chance!
WOW, I just love it! I cannot even believe that is the same dresser. You guys did an amazing job! Thanks so much for sharing at The Fun In Functional!
Thanks for saying so Jessi! It was a long process, but we feel like it was definitely worth it!
Seriously, this is so cool. Just wanted to let you know I featured this today on my blog! You can check out the feature and grab a button here: http://practicallyfunctional.net/2012/09/the-fun-in-functional-link-party-16/
Jessi, That is AWESOME! I am excited and honored to be featured on http://practicallyfunctional.net/2012/09/the-fun-in-functional-link-party-16/
I’ll head on over and grab a button! Thank you so much!
Um…that doesn’t even look like the same dresser after you were through. What an amazing transformation!!!! Great job!
Thanks Shannah! It was fun trying to figure out what way we wanted to go with it! We’re really happy with the results! We appreciate the feedback.
Wow and double wow! I am inspired to go search Craigslist! The dresser is amazing. I love the trees! You did an amazing job. Life to the full, Melissa
A triple thank you Melissa! We find a lot of things on Craigslist! (But we always see them in person before we agree to buy) Thanks for stopping by!
This is beautiful! Great job! I really wish I was more handy with furniture…maybe in another lifetime 😉
Thank you Nisha! You’d be surprised just how easy it really is!
Love love love how this dresser turned out – the treeline was the perfect whimsical touch! Great job!
Thanks Rhonda! Jacque’s thinking about turning one of our bedrooms into a woodland themed room, so this may be the start of a line of furniture:)
Stunning!!! Can you give me info on the HVLP sprayer model you use. I have an air compressor, is that what powers the sprayer.
So glad to have found your site. Now that I have pinned this I will be returning again and again.
Cindy, thank you so much for letting us know you liked the dresser! Our HVLP sprayer is made by Campbell Hausfeld and is called a restoration quality HVLP paint sprayer, model number HV2500. It has what’s called a 2 stage tangential turbine that supplies the volume and pressure that the nozzle needs for a constant steady stream. I did look at buying just a HVLP gun/nozzle but the people I talked to assured me that my 6 gallon 150 psi pancake air compressor would not be able to keep up with the volume that the HVLP gun needs for a steady stream. Hope that helps:)
wow, that is super amazing!
Thanks for saying so! We love it too!
The dresser looks great and it’s so unusual too. Love the twig design.
Thanks! While I was walking through a shop while we were on a weekend trip, I saw a painting that gave me the idea!
That turned out so gorgeous! I love the colors and you provided a great tutorial. Thanks for sharing. 🙂 Megan
Thanks for the feedback Megan! We really do love trying to come up with fun projects for our house!
Hi Matt, after receiving your response about the HVLP sprayer I have been scouring the Internet. There seems to be several HV2500 models. Being a woodworker and never using a paint sprayer I am so confused. If you have the time could you find and send me a link to the model you use. I am grateful for your time and help. Cindy
Cindy, ours is the HV2511 but I found this model to be comparable to ours. http://www.cpocampbellhausfeld.com/campbell-hausfeld-hv2500-2-turbine-high-volume—low-pressure-painter/cbhnhv2500,default,pd.html?ref=cj
I absolutely love it…just awesome!
Thanks for linking up – check back tomorrow because I am featuring ya!
Stacey of Embracing Change
Stacey, I am completely ecstatic to find out about the feature! I’m honored to find out that you liked the dresser! Thank you so much!
Wow, that is seriously cool. Lots of work, but look at how good it looks. This will be one of the features at tomorrow’s Wow Us Wednesday.
Kim,
I am absolutely honored for the feature! Thank you SO much!!! We love linking up with http://www.savvysouthernstyle.net so I’m really excited that you liked our dresser!
Thanks for linking up! I featured you today :o)
Stacey of Embracing Change
Bravo! Bravo! Your dresser is FABULOUS!
<3 Christina at I Gotta Create!
Wildly Original linky party is open.
Wowzers! I am in awe! What a dramatic piece. You’ve got all the gizmos and creativity to make this piece sing! Well done!
You are cordially invited to join http://www.theblogsisters.com! (boys can join too!)
Cheers!,
Barbara
Barbara, Wow, I’m honored! Thank you so much for your feedback on the dresser, I’m glad that you liked it! I will definitely be headed to check out the http://www.theblogsisters.com
Hi! I have just moved into a new home and finally have a garage to dedicate to crafting. I was wondering what you could tell me about your paint sprayer. The guys at Home Depot were not very helpful in knowing what to look for. Any help would be really appreciated. Thanks!
You guys are rockin’ it lately! This is awesome…..LOVED the kitchen remake too!
–Katie
Thank you so much for linking this up to the Pinworthy Projects Party last week! You were featured today! I hope you will stop by and grab a button.
Shannah, I am so excited to see the dresser was featured on the Pinworthy Projects Party! I am absolutely overwhelmed and honored to find that it was the most viewed project of the party! Thank you so much! I’m grabbing a badge as we speak!
Great tutorial and the dresser is beautiful. I have a link party on Wednesdays, and I would love it if you would link this and any other posts. It is called Wednesdays Adorned From Above Link Party. It runs from Wednesday to Sundays.
http://www.adornedfromabove.com/2012/09/reeses-smore-brownies-and-wednesdays.html
I hope to see you there. I am your newest follower, and I would love for your to follow me also. Have a great Day.
Debi Bolocofsky
Adorned From Above
http://www.adornedfromabove.com
I found you over at House of Hepworths. I LOVE how this dresser turned out! Just beautiful!
Jen
sewfabulous-now.blogpsot.com
Absolutely gorgeous! So jealous but also inspired to try it too! Thanks for the inspiration today!
Matt–you really did a fabulous job on this piece! Love the woodland theme. Great tutorial too!
“catching’ you this week, thanks for linking up and linking back!
gail
ps hi Jacque!
Gail, I’m honored that you think so! This turned into a labor of love for sure! Jacque says hi back!
This has left me speechless, and my hubby will vouch for what a dificult feat that is…
Great makeover!
Really inspirational…
I link this on my blog, I hope you don’t mind.
This is breathtaking! Dressers are one of my favorites to redo. Love how your hubby is so involved, too. 🙂
Would love to have you over on the Korner for our “Trash 2 Treasure Tuesday” party. It’s not a new party, but would love to have some “new blood”.
Kammy, you’ve just made me blush! Thanks for the dresser love! We’d love to take part in Trash 2 Treasure Tuesday!
Oops, I think I wrote that comment to your wife – my apologies, MATT!! I should say, love how YOU do these awesome redos with your wife by your side. Awesome! Thanks for sharing. 🙂
Great dresser
Thanks Carrie, I’m excited to find more pieces in need of some TLC, I’d like to use the same concept but try some different themes out!
Absolutely adore this! Great work
Thanks Alisha! I’m thankful that Jacque let me try the woodland theme out! She had other plans for the dresser, so she was kind enough to throw me a bone on this one!
I love it! Thank you for the tute. Visiting from Kammy’s Corner.
Daena, thanks for stopping by! We’re new to Kammy’s Corner, but will definitely be regulars!
Matt, I am in love with your dresser! I especially like the trees on it. And Jacque was right, the new color really helps the details stand out. NICE!!!
Brittany, thanks for giving us some “dresser” love! It’s our only piece that’s ever gotten a double makeover! So given the results, maybe I should rethink some of my other projects… Thanks for the visit!
Incredible! Good call to make the dresser white. I was a bit skeptical at first but it looks amazing!
I was totally inspired by your dresser that I created one that was similar. Thanks for the inspiration! Here’s the post: http://paintedtherapy.blogspot.com/2013/01/meet-nathanial-dresserbuffetconsole.html#
This is SO beyond fabulous. Perfect color, pattern, balance… it’s gorgeous!!!!
You make the perfect team 🙂
Thanks Shannon! This is one of my favorite projects that we’ve done! It is definitely nice to be able to work on these projects with Jacque! She may not say the same thing about me though:)
How can I get the stencil?
Came over from Pretty Handy Girl. This is amazing! Love, love, love!!!
Lisa, we’re so glad to have you visiting from PHG! We’re so excited to be part of such an incredible team! Hope you’ll stop by again soon!
I love this so much!!! I hope you don’t mind, but I featured it in my latest stenciling post!! 🙂 You guys rock! Here’s the link if you want to see the shout out: http://drabtofabdesign.com/2013/08/stencil-a-flower-pot/
I wish you’d make the vinyl part to sell to ppl if buy it